Tuesday, October 30, 2012

A Rainy Day Calls for a Little TLC

By: Mandy Whitaker
 
 
Prayers go out to those on the east coast who are enduring the effects of Hurricane Sandy.
 

Hey, Everyone!

 
According to the Weather Channel, at approximately 8 a.m., this morning, 8 million people are without power. Wind gusts of up to 96 mph have been recorded during the aftermath of the storm along the east coast.  After the storm has passed, cold air will be moving through the Midwest causing temperatures to drop to nearly 30 degrees.  Also, heavy snowfall is taking place in parts of Maryland, Tennessee and Pennsylvania.  Over 26 inches of snow has fallen in the western part of Maryland.
 
When I looked out my window this morning, I saw lots of rain and blowing trees. Yep, not the type of weather that makes me want to go outside! The Midwest is definitely seeing some of Sandy's attitude!
 
Are you stuck indoors because of mean, ol' Sandy?
 
Well...
 
What better excuse to have a little spa day!
 
I made this super simple body scrub with ingredients that are most likely in your kitchen already! This will get your skin soft and smooth!


What you will need:

 
1 cup White Sugar
1 cup Brown Sugar
Olive Oil (measure to preference)
A clear Jar (I bought mine at Hobby Lobby)
 
 
The sugars work as natural exfoliates and the olive oil contains both Vitamin E and oleic acid.  Oleic acid helps to soften the skin while Vitamin E improves the elasticity of the skin!

 Well that sounds perfect!

 
 First, pour both the white and brown sugar into a bowl and mix well.  Then, begin mixing in the olive oil. Start off with a little and mix in more when needed.  I personally like my scrubs more liquidy (is that even a word?). Just keep mixing in more olive oil until it reaches the texture of your liking!  When your body scrub is ready, pour the mixture into a jar.  I decided to tie a pink bow around my jar because, duh! How cute is that? TIP: choose a jar that has a bigger opening so it is easier to scoop out the scrub!


 When in the shower (I prefer while I have my conditioner in my hair), take some of the scrub and begin to put it all over your skin in circular motions to exfoliate! Wash off with warm water and admire how smooth your skin feels!
 
Put on a thicker body lotion because exfoliating your skin can sometimes make it a tad dry!  I recommend The Body Shop's Strawberry Body Butter! (Smells Amazing!)
 
Another option is to use your scrub while you have a face mask on! Why not? While your waiting the usual 10-15 minutes for your mask to work it's magic, why not exfoliate your body!? Perfect!  I recommend Queen Helene's Mint Julep Face Masque, Origins Clear Improvement Mask, or the Lush Cosmetic Catastrophe (in store)!
 
Once again, prayers go out to those on the east coast!
 

Happy Spa Day!


Sunday, October 28, 2012

Halloween Movie Maddness: Steve Zissou DIY Costume


By: Mallory Jordan, moderately crafty

Don't have a costume figured out yet? Don't panic!

This costume is aimed towards those in need of an awesome Halloween get-up that doesn't cost a lot of cash. When in poverty, go to Goodwill!

Many local bloggers have jumped on the Goodwill train for easy and affordable costumes.
 I even found an entire Pinterest page filled with DIY Goodwill costumes.

Goodwill is actually selling a small selection of new costumes and accessories this year. However, I still want to keep the creative tradition and find my own pieces to a unique costume.

The heroic Steve Zissou is my Halloween inspiration this year. For those of you who have seen the Wes Anderson film, "The Life Aquatic," this is a pretty simple costume that costs too much in stores.

Photobucket
Photobucket  Store bought Costume -->
 $65.00-$70.00


Photobucket


Costume pieces purchased at Goodwill
Less than $10  -->
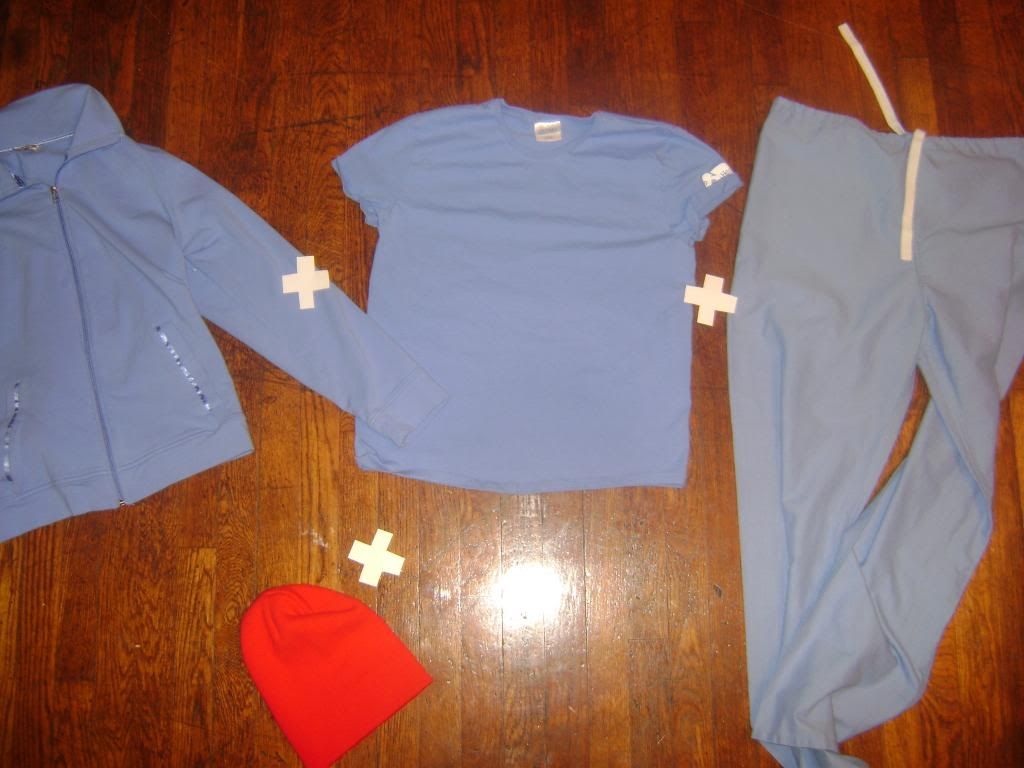
Make sure the look is monochromatic and matches. I have a zip up jacket, a t-shirt (a polo works as well), scrubs, and a red beanie cap.


Photobucket
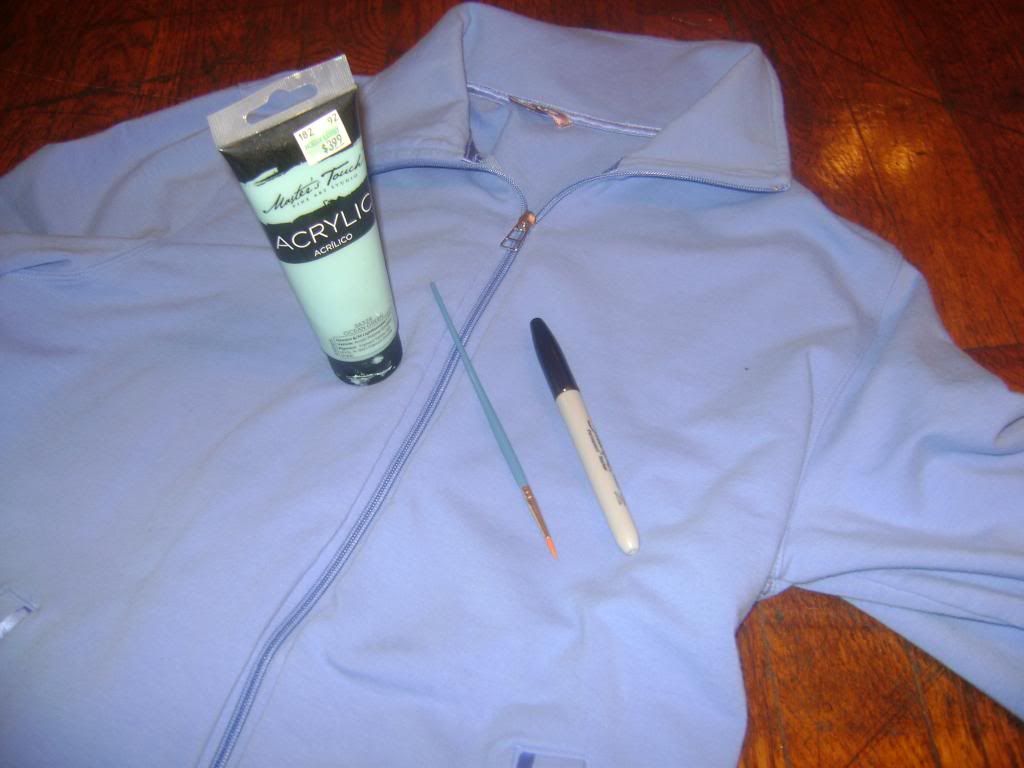
The most important detail of the costume is the Zissou logo. There are multiple variations of the logo, but I am going to use a black Sharpie for the darker details/outline, and the light blue acrylic paint I used previously for my leaf project. Dark blue paint for the outline and yellow paint for the smaller "z"'s are other alternatives.


Photobucket


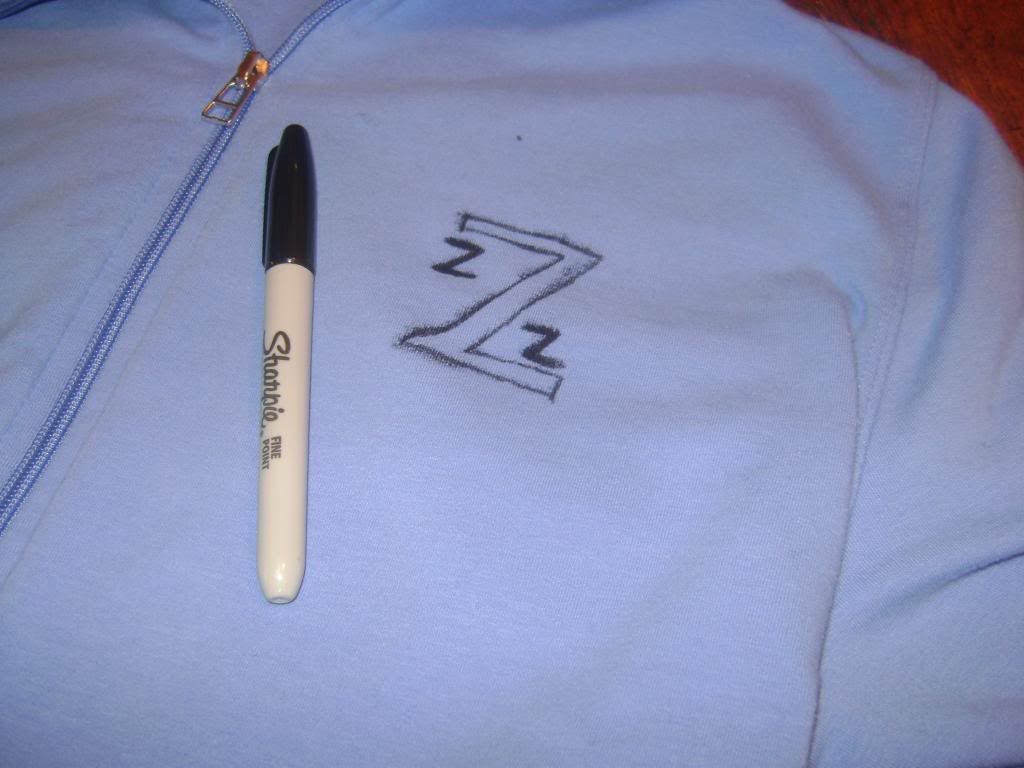
First, I use the Sharpie to make an outline for the large "Z" and heavily draw the small "z"'s on the upper left inside of the "Z" and the lower right of it.


Photobucket


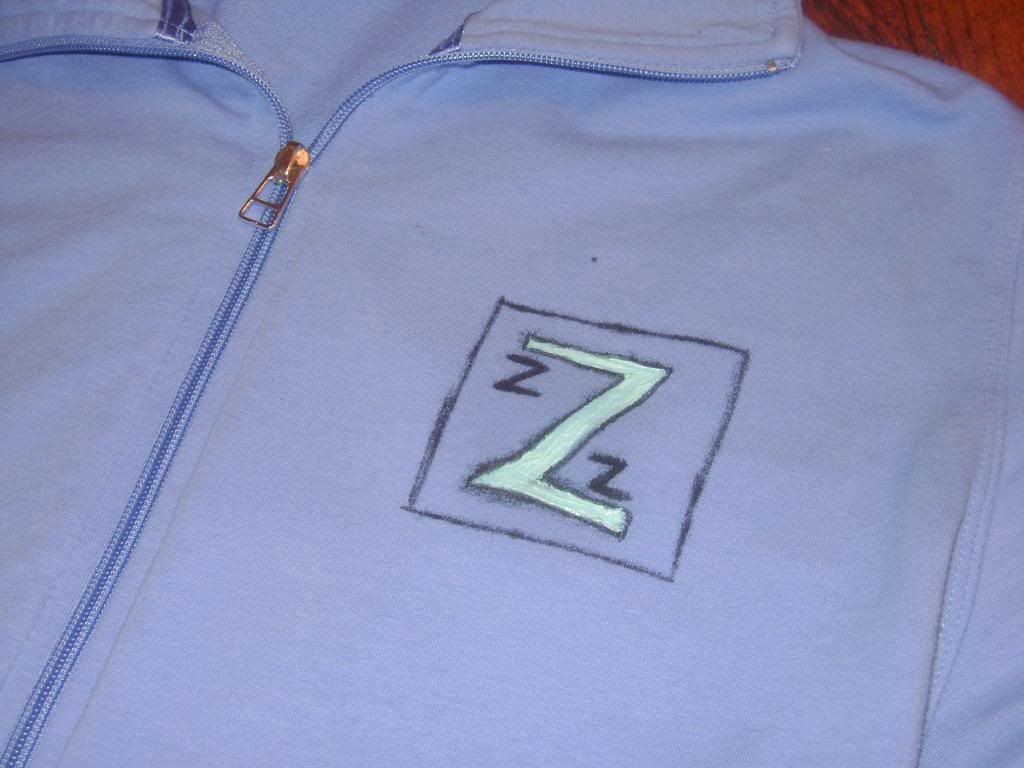
After I have used a straight edge to make the outline around the logo with my Sharpie, I bring out my light blue acrylic paint. With the small brush, I paint inside the Sharpie line.


Photobucket
Photobucket


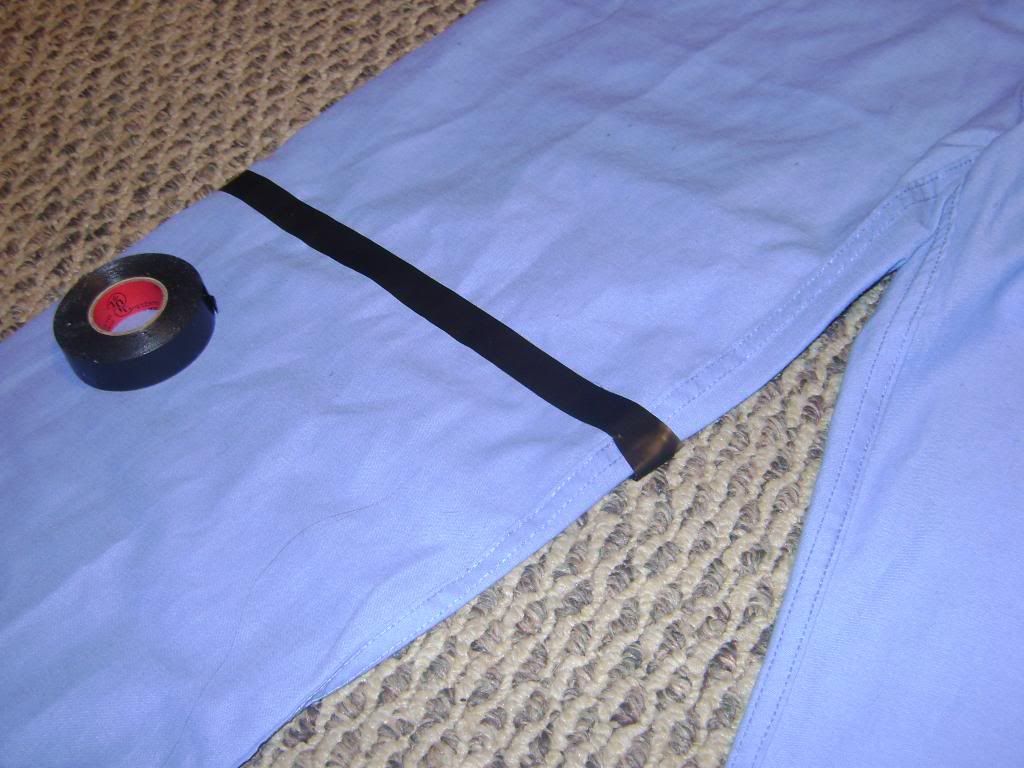
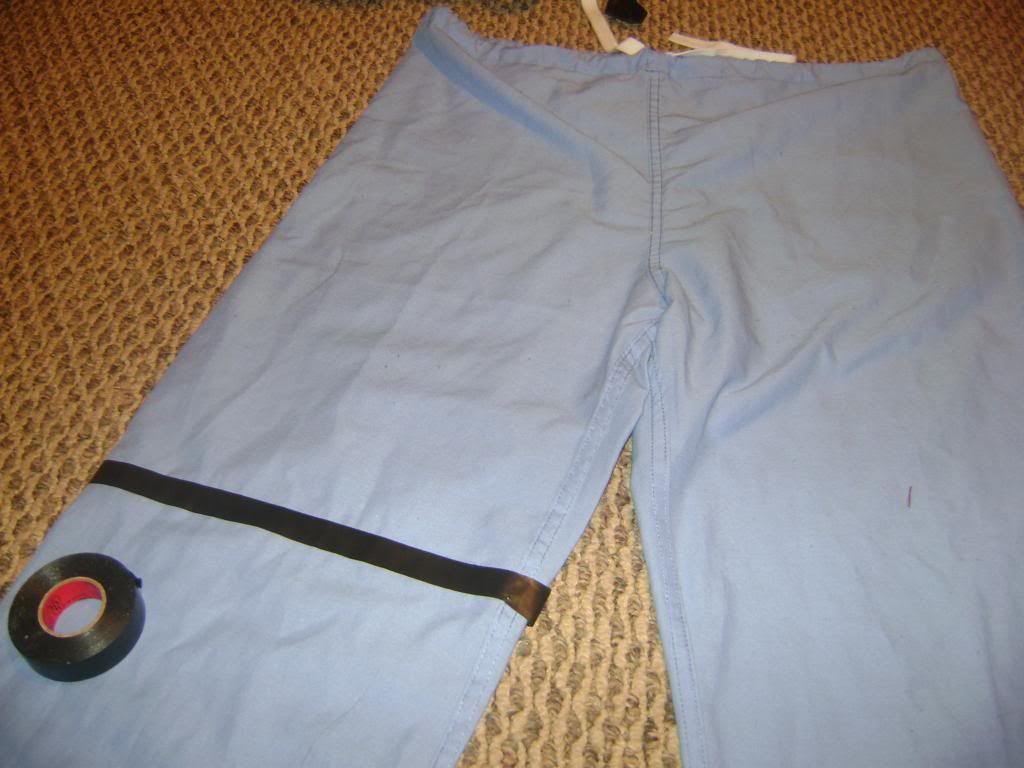
Finally, find some electrical tape or black duct tape (I prefer electrical because it is less shiny). This is for the holsters Team Zissou has around their legs.


Spread out the fabric so that the tape sticks between creases. This makes the tape looser and a better fit on the fabric. You don't want to make the tape tighter than the pant or the tape could break off when worn.


PhotobucketPhotobucketPut on the t-shirt, jacket with painted logo, scrub pants with the electrical tape for the "holster" and the red beanie for the final touch. Slip on some sneakers (Adidas preferably). Now you have the perfect, inexpensive Steve Zissou Costume!

For other last minute Halloween Goodies, click the link!

Friday, October 26, 2012

Mama's Pumpkin Bread

By Lindsey Riley (The Crafting-Challenged Blogger)

Hey everyone! I know that I typically post on Fridays but due to sickness, I missed posting last week. Sorry about that.

Ball State students were on Fall Break this week past weekend and earlier this week. The four-day weekend typically comes after midterms in the middle of October.

As a resident of the Chicagoland area, I never had a Fall Break. When I came to Ball State, I did. From what I understand, the reasoning behind the extended weekend is to give students the chance to go back to the farms and help with the harvest. There are probably very few students on the campus that actually go home and do such a thing! :D

Over my Fall Break, I went back home to try to get over all the sickness I've been going through. I did, however, talk my mom into making me some of her amazing pumpkin bread. And then I talked her into letting me film her making it so all of you can can learn how to make the fall treat.

Enjoy!


Tuesday, October 23, 2012

Baking with Fall Season's Staple: Pumpkin!

By: Mandy Whitaker


Pumpkins.


Pumpkins definitely come to mind when I think of the fall season.  Well folks, the fall season is upon us and what better way to enjoy this season than with an easy recipe using the fall season staple: pumpkin.

According to the Associated Press, despite the drought, pumpkin farmers are expecting a bright crop.  Pumpkin farmer, John Ackerman, says, "that's because pumpkins thrive in dry weather that holds back fungus, mold and other rind-rotting diseases."  He also says that his crop is looking fantastic and starting to turn orange.

Thank goodness!  There WILL be pumpkins this season! So, now we can all sleep at night....

But, seriously, I have an easy muffin recipe that is perfect for fall!

Like I said, when I say "easy" I definitely mean it, especially when it comes to cooking.  During this whole process: "Just wait a minute, Mandy is baking...Never thought I'd be saying that...," was said by one of my parents. Sad, but true. So, if I can manage to make this happen (of course, with parental supervision), so can anyone else over the age of...probably 7.

 On to the recipe:

What you need:


1 box of spiced cake mix
1 can of pumpkin
1/2 bag of mini chocolate chips
1 egg (optional)

Pre-heat the oven to 350.


  Mix all ingredients into a large bowl. 

The egg isn't necessary, but my mom put it in there... I think it's to make the stirring process a little less dusty with the cake mix, but I'm not sure. (Moms know best, right? So just throw one in there to be on the safe side.)

After everything is all mixed, start putting the mixture into muffin tins.  You can either spray the tin with Pam, or use cupcake holders.  I used cupcake holders because it's much cuter that way!

Place the pan in the oven, and set the timer for 20 minutes! (I accidentally forgot to set the timer...rookie mistake!)

Once the 20 minutes are up, take the muffins out of the tin to cool.


And, there you have it! Pumpkin muffins that are simple to make!

                                           Hope ya'll have a terrific week!


Monday, October 22, 2012

Football Season: Referees and Chili

By Britny Burton [self-proclaimed craft freak]

Not only is this time of year known as fall, it's also football season. The biggest news this year in the NFL is by far the referees. Although, for us Indianapolis fans, the lose of Peyton Manning may be a close second. Nonetheless, while the referees are back, I wanted to take a look at what the big deal was.
Chili is also a staple for every Sunday football game so in lieu of showing two sides of the NFL referee lockout, I'm including two chili recipes. One is my own personal white chicken chili recipe and the other is courtesy of my boyfriend, Aaron's firehouse chili.

The referee lockout was a labor issue between the NFL [National Football League] and the NFLRA [National Football League Referee Association] that began in June 2012. The previous agreement  between the NFL and the Referee Association expired in 2011; however, due to the players lockout last year, the referees were put on hold. Referees want retirement plans, but the team owners argued that most part-time jobs don't offer benefits.
An agreement wasn't reached before preseason so replacement referees from the college division were officiating for the first three weeks. The rules for college and professional are fairly different causing the replacement referees to not have the knowledge nor experience to properly officiate a game.
An agreement was finally reached on September 26 and officials took their place on the field again. The lockout ended with salaries increasing from $149,000 to $173,000 on average and 401k for officials after twenty years of service. Also, five officials will be hired to be trained to make the program better in the long run.
Fans and players alike are glad that the officials are back. Colts kicker Adam Vinatieri said, "At the end of the day, we just want to have the best product on the field for the players and for the safety of the players."

Aaron's Firehouse Chili
-4 cans fire roasted tomatoes
-4 cloves of garlic
-2 hot chili seasoning packets
-3 cans chili beans [1/2 hot and 1/2 mild]
-1-2 lbs ground beef [we used 93% lean, 7% fat]
-2 extra large portabella mushroom caps; diced

1. Brown the meat with some of the chili seasoning and all the portabella mushrooms.
2. Throw everything into a crock pot and let cook on low for three to four hours.


White Chicken Chili
-3 to 4 pieces of chicken breast, chopped
-2 cans great northern beans
-1 can condensed cream of chicken
- 1/4 cup verde sauce
-1 packet taco seasoning
-1/2 to 1 container of chicken broth [can use 1/2 container and water]
-1 can white corn

1. Throw everything into a crock pot and let cook on low for six to eight hours.
2. Can be served over noodles to extend the meal.

We like to put sour cream and shredded cheese on both our chili's. Let us know what you think. Also, if you have you're own chili posted online, let me know and I'll link it to this post!

Sunday, October 21, 2012

Alternative Pumpkin Decorating


By: Mallory Jordan, moderately crafty

I just went to Stuckey's and got my own pumpkin. I'm terrible at carving and have probably carved out the same pumpkin face since I was 10. I have found some alternative ways to decorate a pumpkin to make it look nicer on the porch; not like a 10 year old carved it.

One alternative way to decorate a pumpkin is to paint it. The best way to paint pumpkins is to tape a design or doily on the pumpkin and fill in the spaces with a small brush. It makes for a really simple and classy look.

Or, you can hot glue buttons or beads to make words and cute designs. Gluing glass frit or sequence
is another way to glitz up your pumpkin.

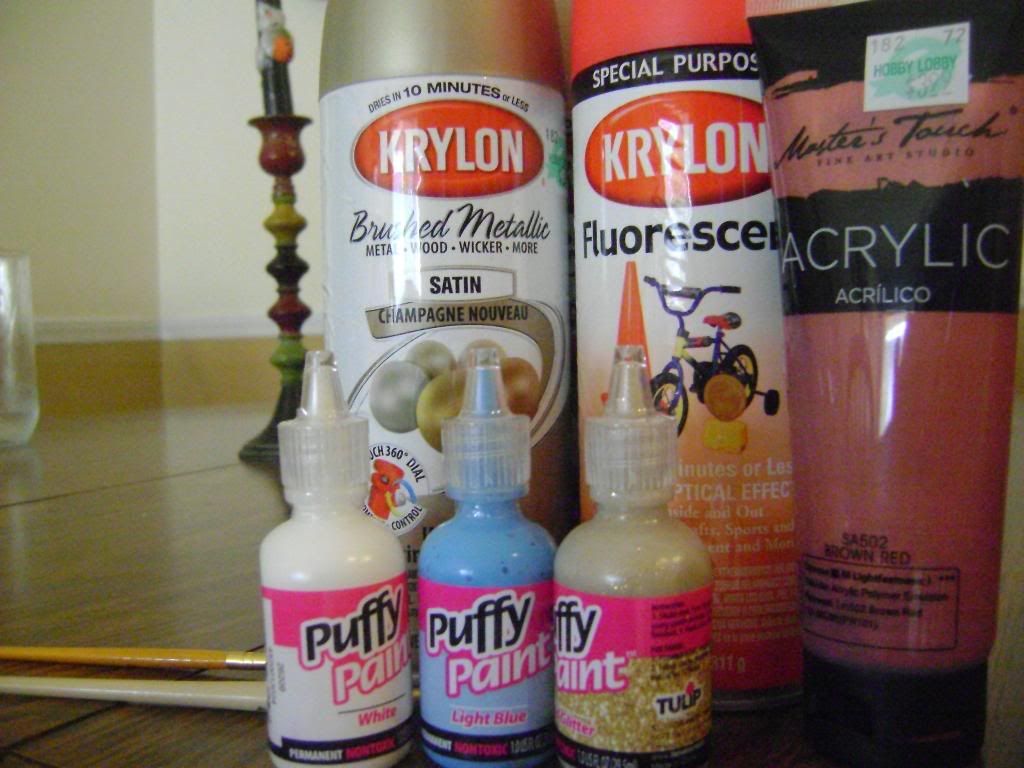
I am going to use spray paint, acrylic paint, and puffy paint to decorate my pumpkin. I found some inspiration on Pinterest, if you couldn't tell from my links.


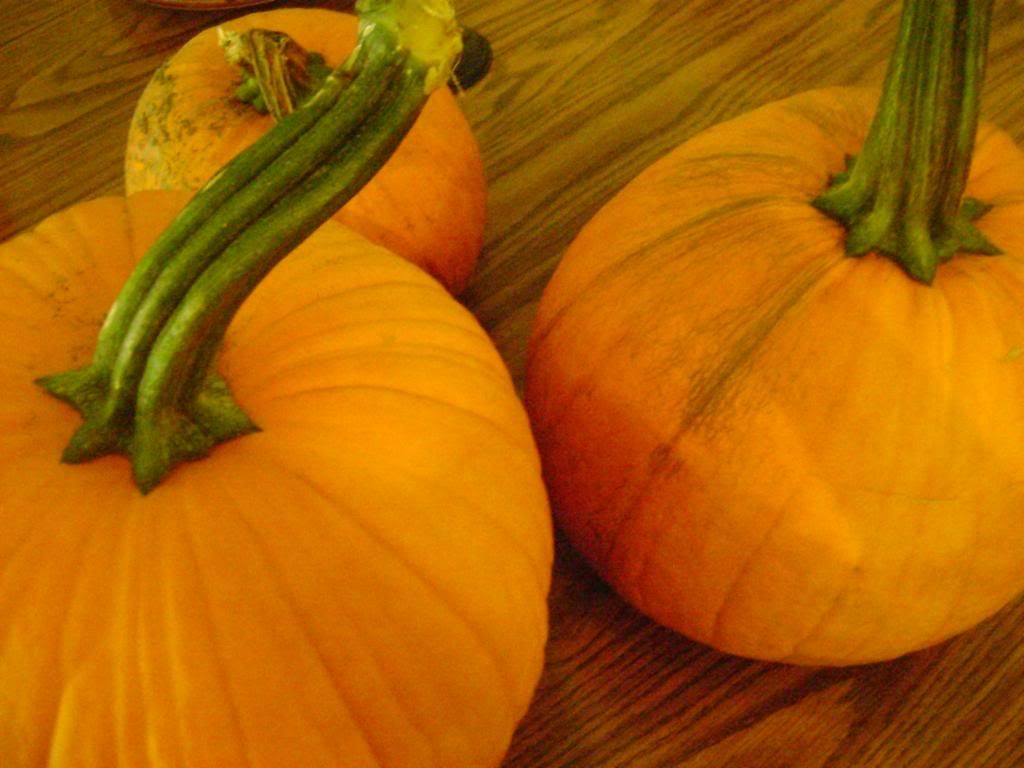
FIRST, go to a pumpkin patch to get a nice, deep orange pumpkin of any size.


Photobucket


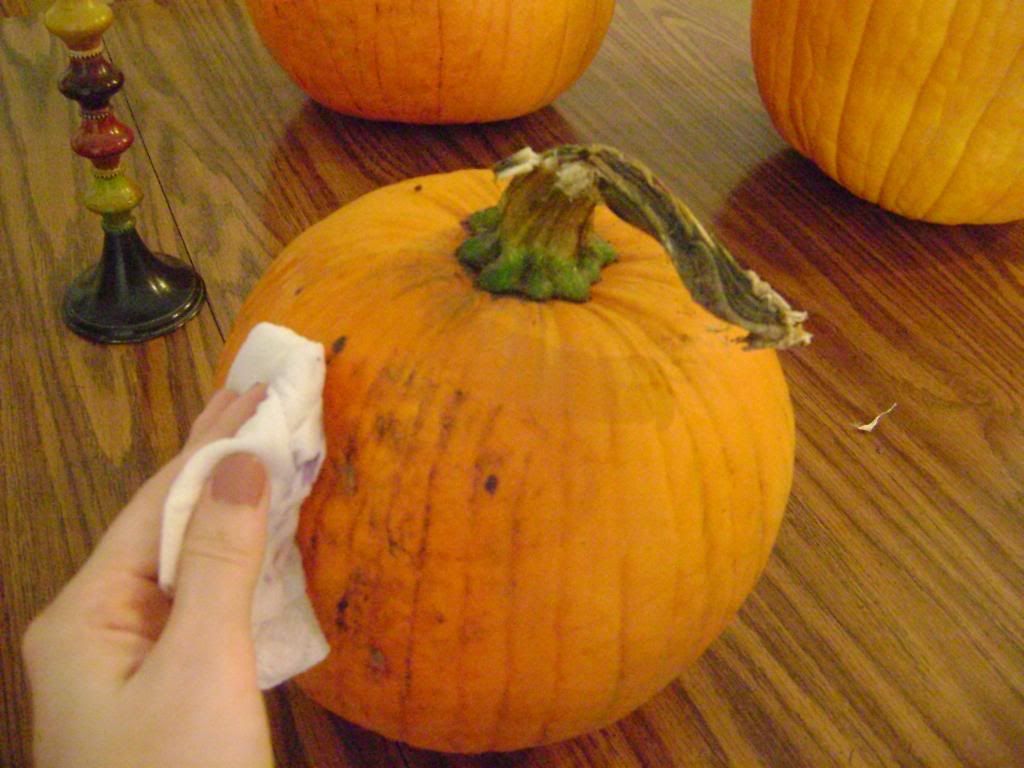
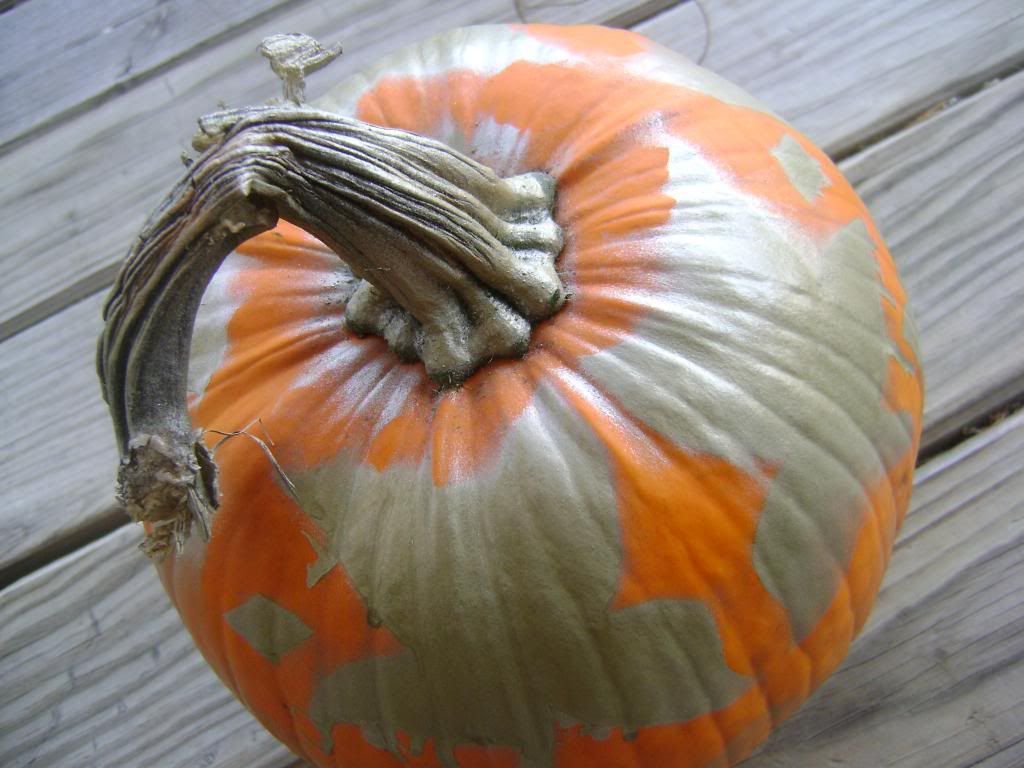
PhotobucketPhotobucketMake sure you clean off your pumpkin so that there is no dirt from the pumpkin patch. Gather your supplies, using colors that match your house. I used gold spray paint, gold glitter puffy paint, and metallica maroon acrylic paint.

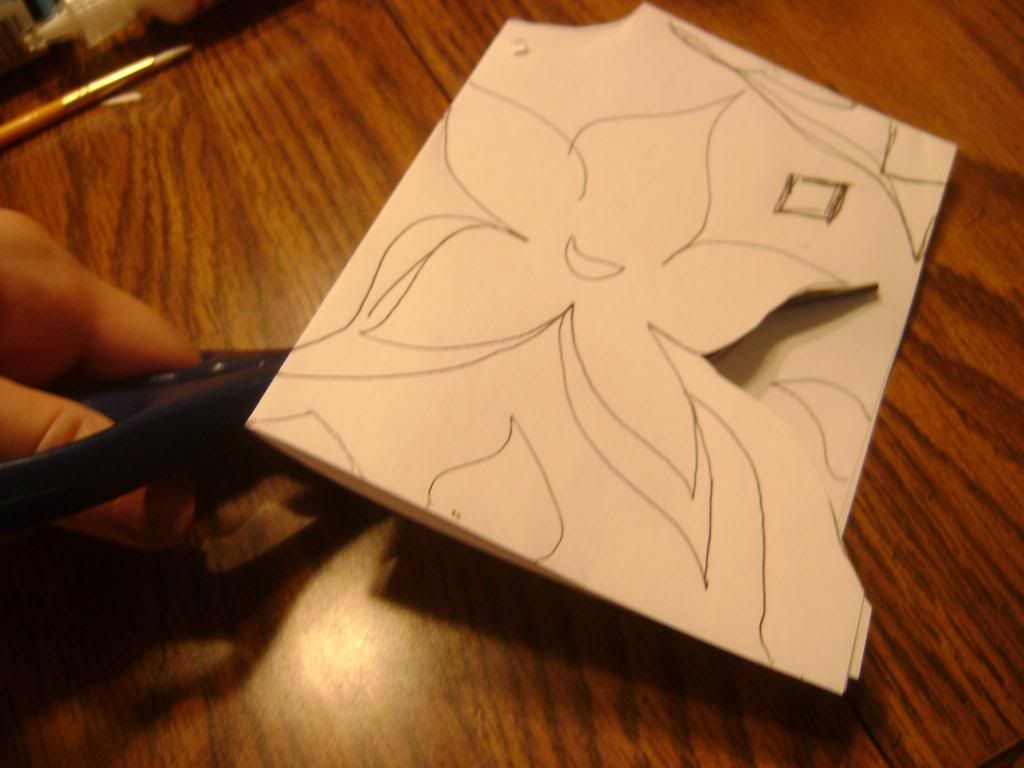
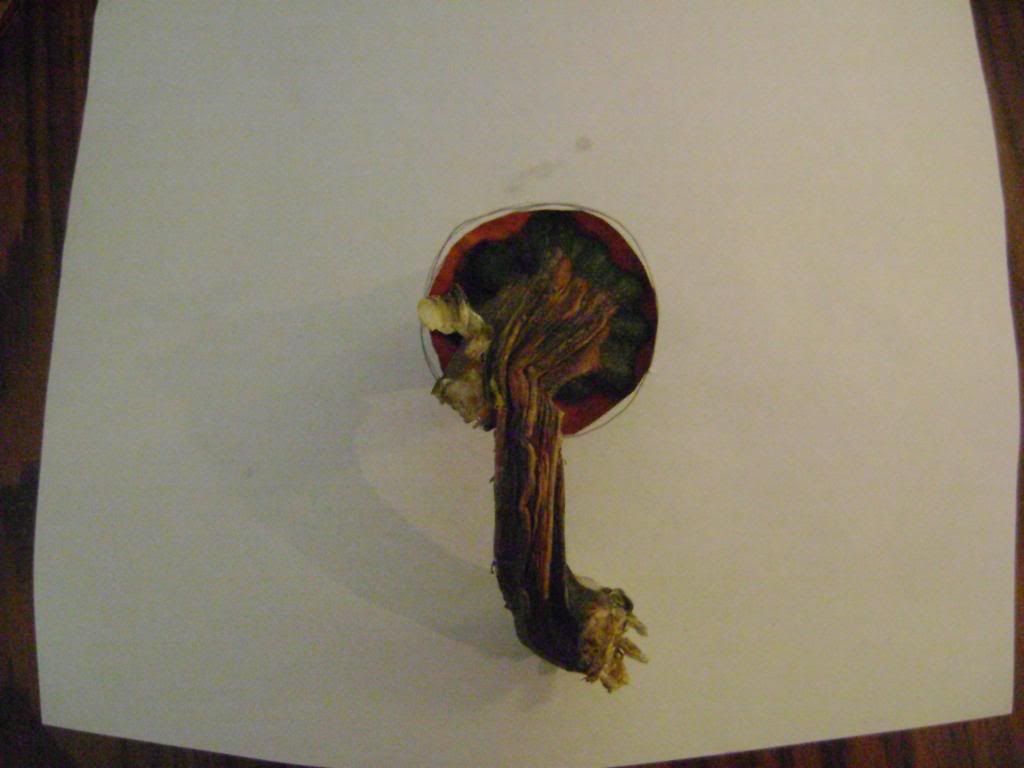
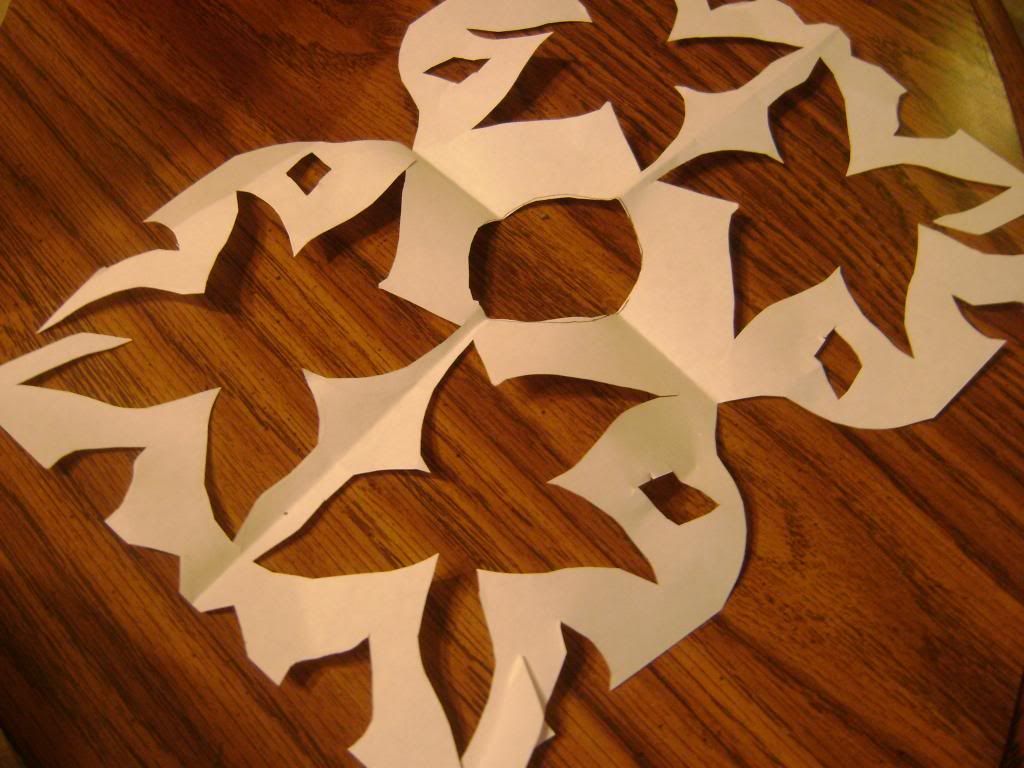
PhotobucketPhotobucketTo make a stensil for the spray paint, first cut a hole in the center that fits around the stem of the pumpkin. Then, fold the paper in half twice. Draw your design, making sure that you know what space you're cutting. DO NOT cut along the crease/folded lines.

PhotobucketPhotobucket
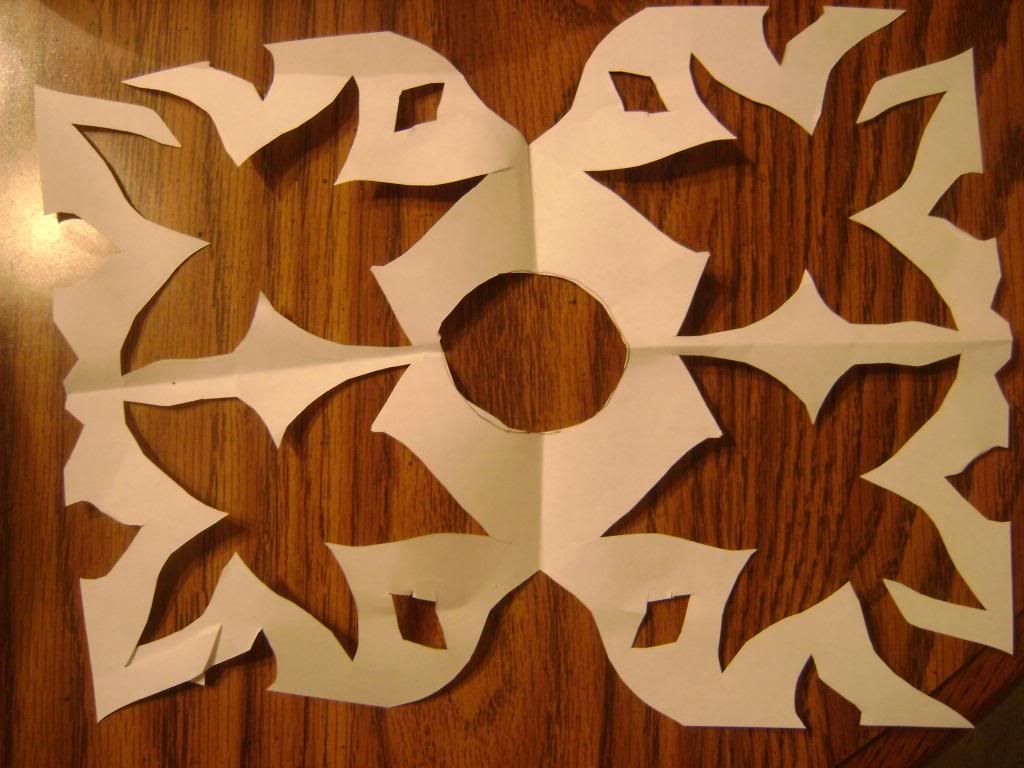
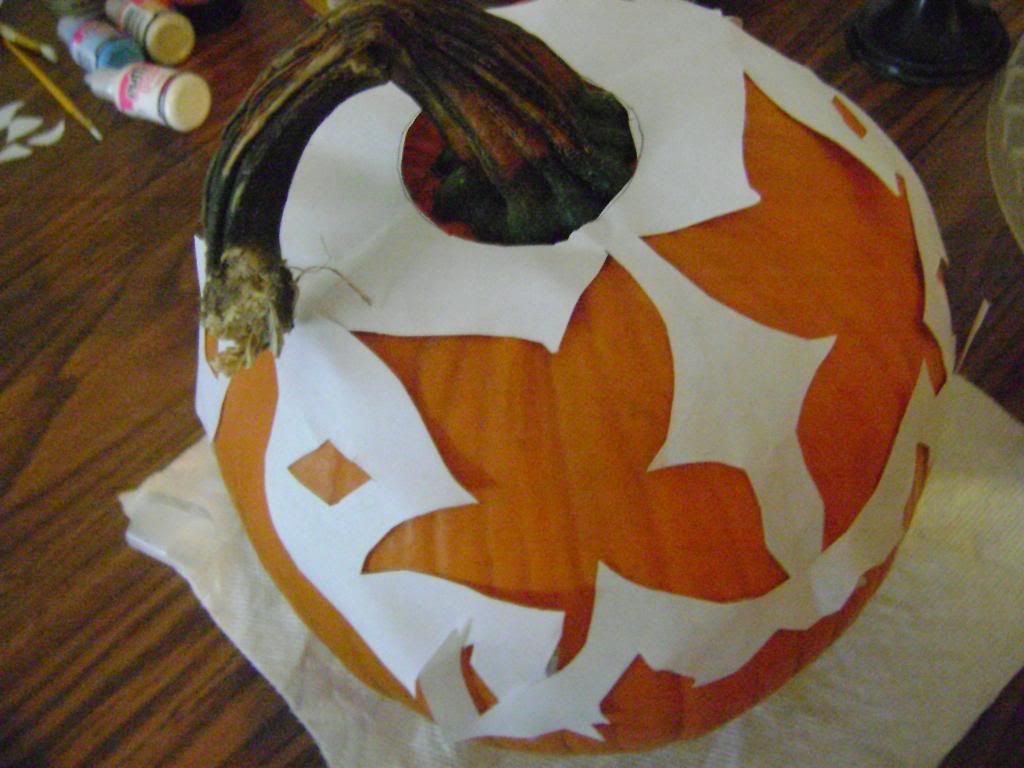
Unfold the cut design. Put tape on the edges before putting it on the pumpkin so it sticks. Notice I altered the shape of the outside of the paper. Don't just create a border on the edges. Make shapes and designs grow from the edges so your whole design is shaped interestingly.

PhotobucketPhotobucket
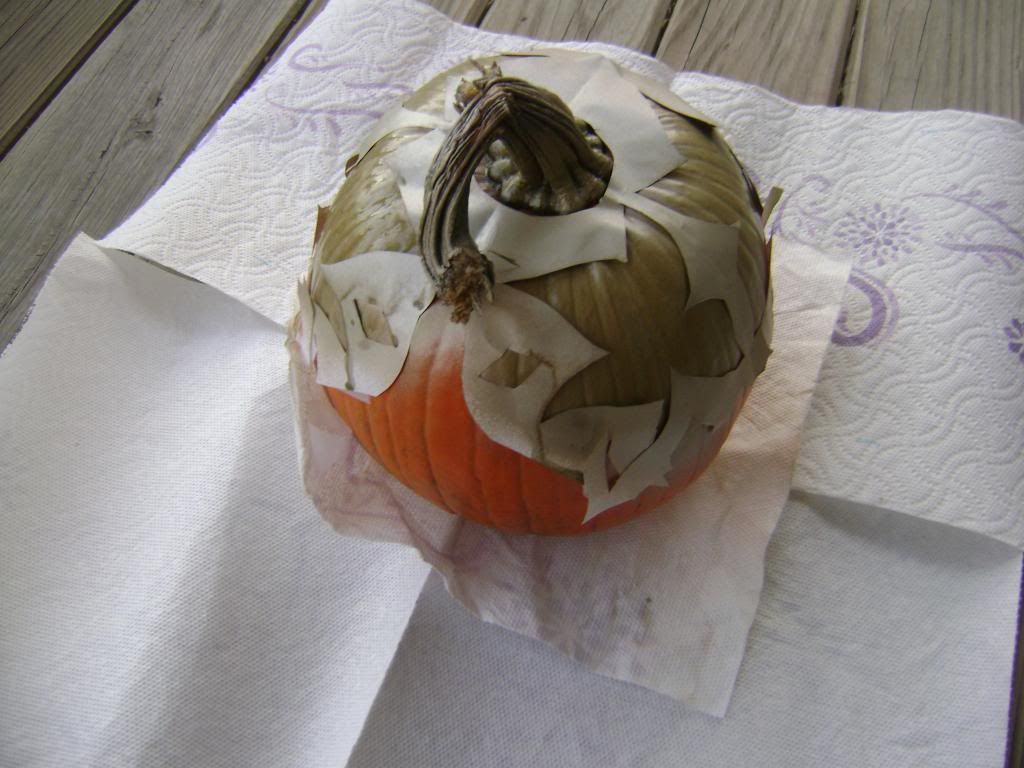
Slip the stensil over the stem and tape it down to the pumpkin. Apply the spray paint only to the top of the pumpkin as much as you can.
PhotobucketPhotobucket
Once the spray paint is mostly dry, remove the paper stensil. Then, get the rest of the supplies to start decorating.
PhotobucketPhotobucket
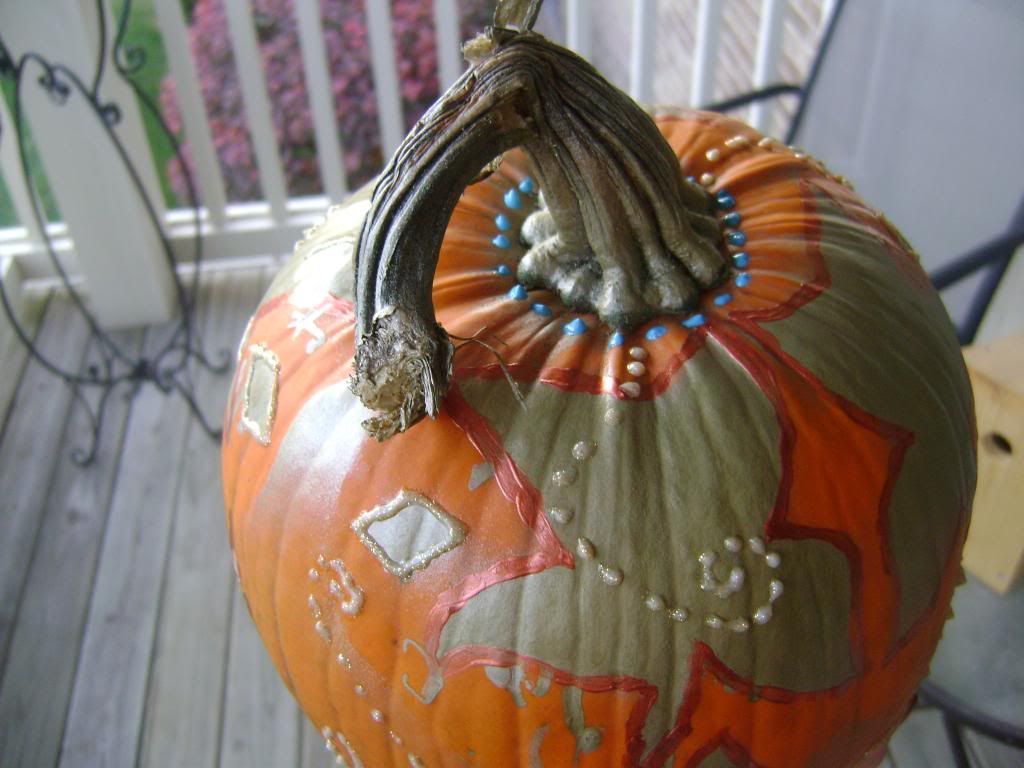
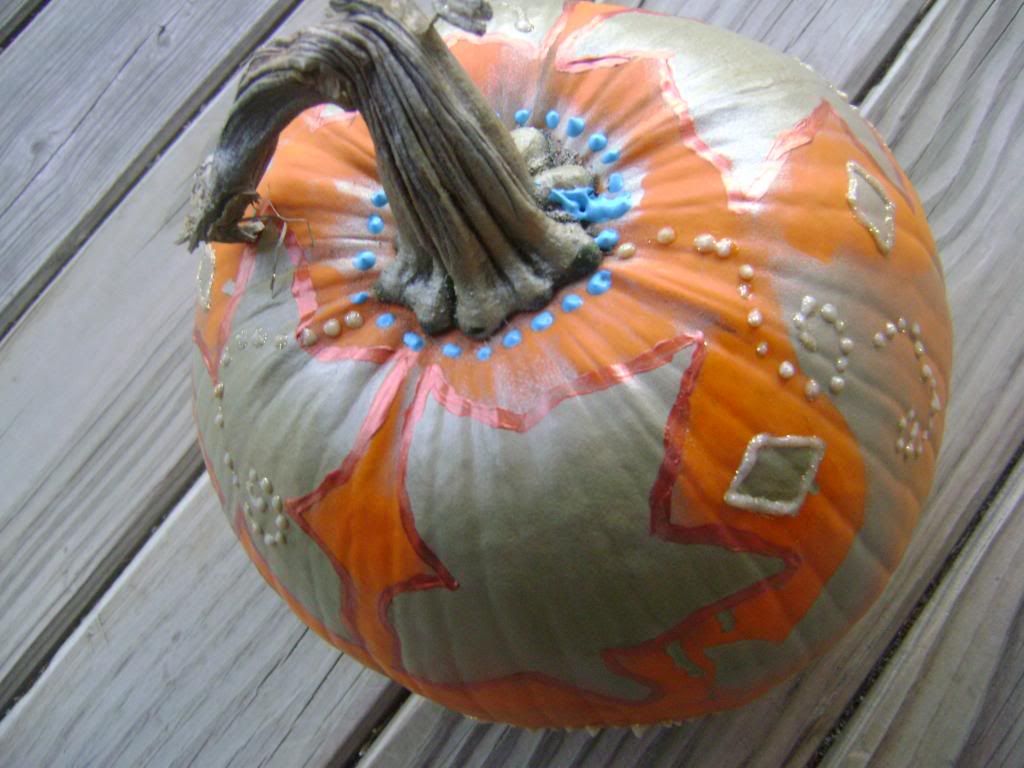
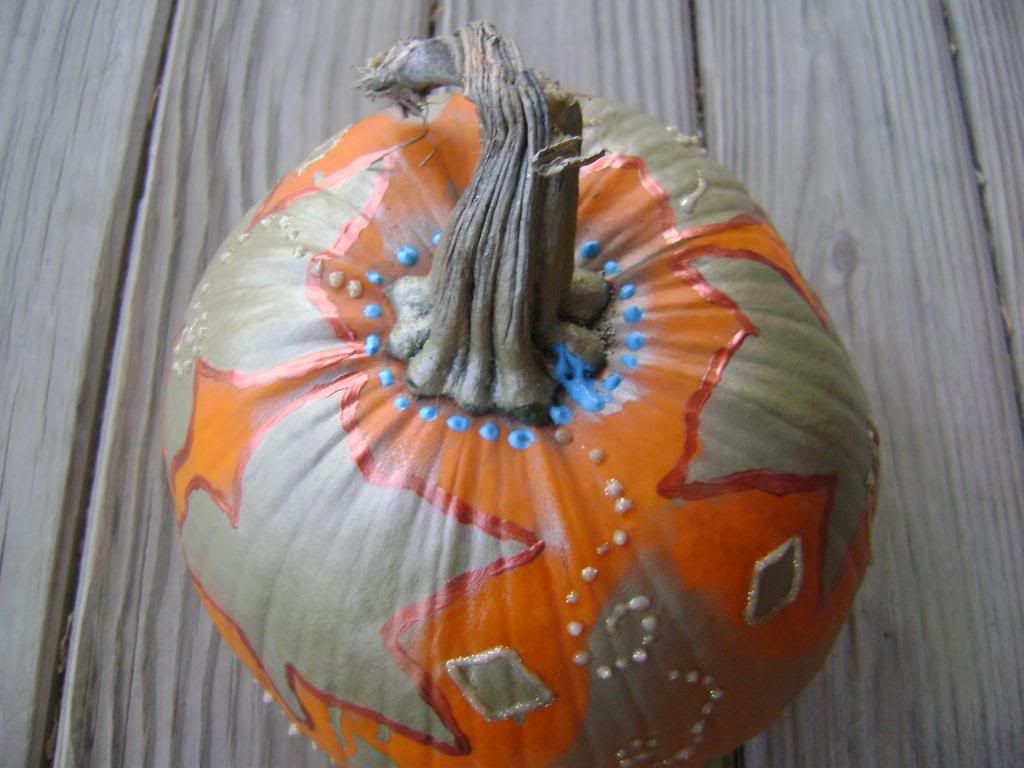
I outlined my leaves/flowers with the metallic maroon acrylic paint and painted some extra leaves on the pumpkin. I used the gold glitter puffy paint to outline the diamonds and add some whimsical dotted swirls sporadically.  I added a touch of blue puffy paint around the base of the stem as well.


Photobucket

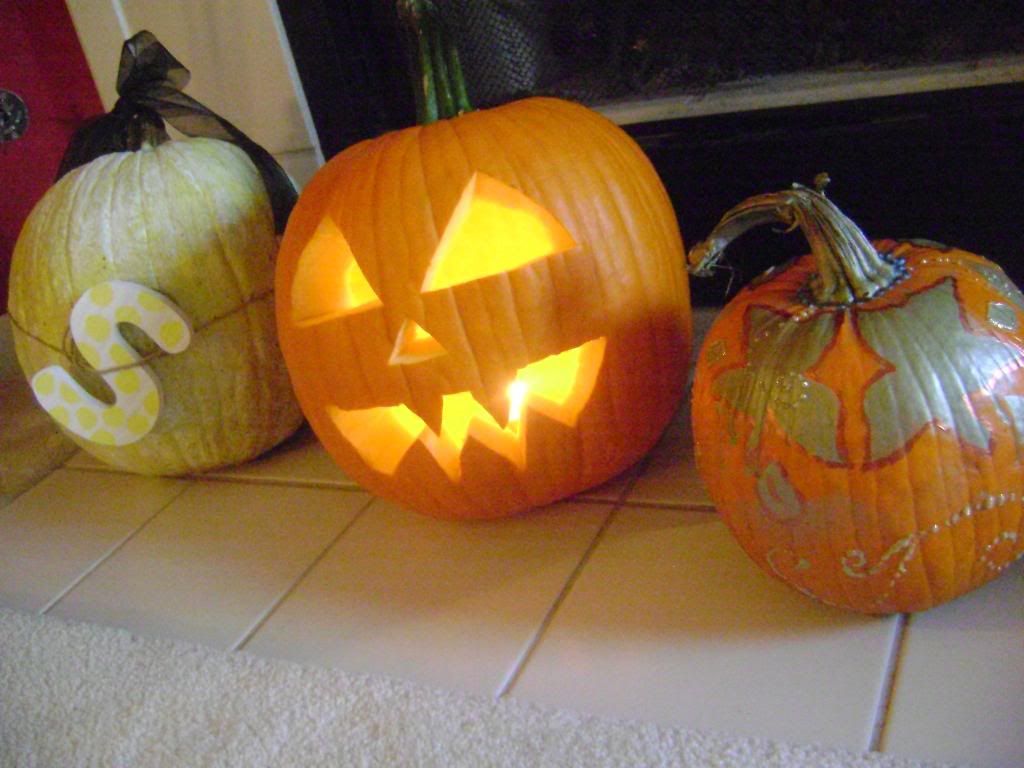
Now, there is another pumpkin to add to the halloween spirited collection! No stressful carving needed.


Monday, October 15, 2012

Where Else Could you Find T-Swift with Organization Tips?

 By: Mandy Whitaker


Hello, Everyone!! 


I don't know about you, but I'm a huge Taylor Swift fan.  

Her new album, titled "Red" is releasing worldwide on October 22, 2012.  According to Good Morning America's website, Swift is releasing 30-second clips of different songs from this album every four weeks leading up to the release date.  The same day, at midnight, the song played in the clip will be available to download on itunes


Swift is scheduled to appear on Good Morning America on the day she releases her new album and scheduled to have a concert in New York City the following day.  

And so the countdown begins of the much anticipated release date...


What else is Taylor famous for other than her catchy lyrics? Her signature "cat-eye" makeup, of course! So, I decided to do an easy but super helpful way to organize your makeup brushes! 

 
When you have a plethora of makeup brushes like myself, these tips and ways to organize your brushes will come in handy!

 All you need is any type of clear and glass vase, (I chose one with my initial on it) and colored beads of your choice (Pink, duh!). 

This makes a simple, but very organized "eye brush" holder. 

  Pour the beads into the glass container and then begin pushing your brushes into the container.  It works perfect and is super cute as well!


Another option I use to organize the bigger brushes, is to buy a pencil holder from the office section of stores or a cute cup as seen in photo (bottom).  Works just as well!


Using these tips will help organize your vanity!


Sunday, October 14, 2012

Tasty Fingers

By: Mallory Jordan, moderately crafty


Most people have heard the story of the woman who claimed to find a finger in her Wendy's chili back in 2005. For those of you who are not caught up in the news, it was a scam. There was a finger in the woman's chili...that she placed there herself.

More recently back in May, a teen in Michigan found a finger in his Arby's sandwich.  Unfortunately for Arby's, this incident does not seem to be a scam. Even the subtitle for the Time article is, "Unfortunately for everyone involved, it appears this actually happened."

Since 2005, human fingers have been quite popular as food toppings. "A History of Human Fingers Found in Fast Food," proves that the most frightening part is only the Wendy's finger finding has been a scam. There was a second incident at Arby's before the Michigan teen and three other confirmed times when fingers have been found in various foods.

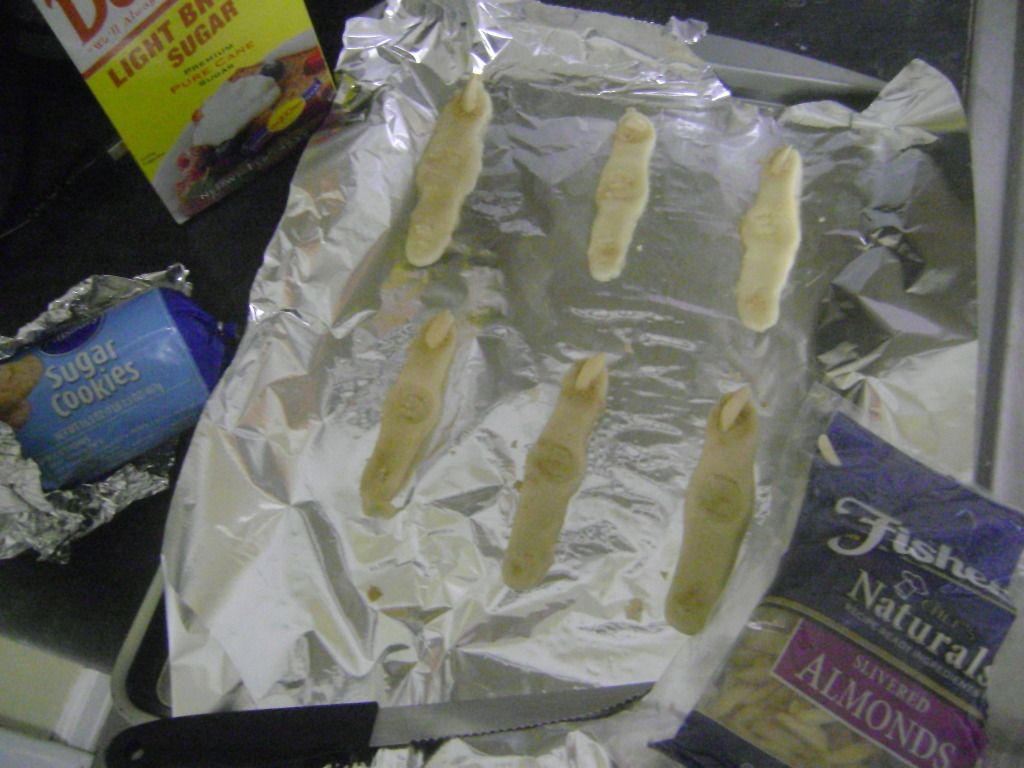
I have found a way to avoid the finger scare. Since Halloween is around the corner, choose to eat fingers instead of being surprised by them. You don't need to eat any unsuspected fingers anymore! Make these cookies so that you, and maybe even guests at a Halloween party, can enjoy the taste of fingers.


Ingredients:

1 roll of sugar cookie dough
Sliced almonds that look like fingernails
Brown Sugar (cinnamon will work too)
Cookie sheet (use foil or Pam to keep the fingers from sticking to the sheet)

*Pre-heat your oven and bake the cookies according to the dough instructions.

 Photobucket

Step 1: Take quarter sized ball of cookie dough and roll it out with your hands

Step 2: Flatten the long strand of dough with your pointer finger. In the middle of the finger, make an imprint with your thumb for the knuckle.

*You will want the dough to be very flat to keep the finger shape. Otherwise, they will spread out in the oven and ruin your fingers.

Step 3: Place a sliced almond at the top for the finger nail

Step 4: Score the nail beds and knuckles. I just used a knife.

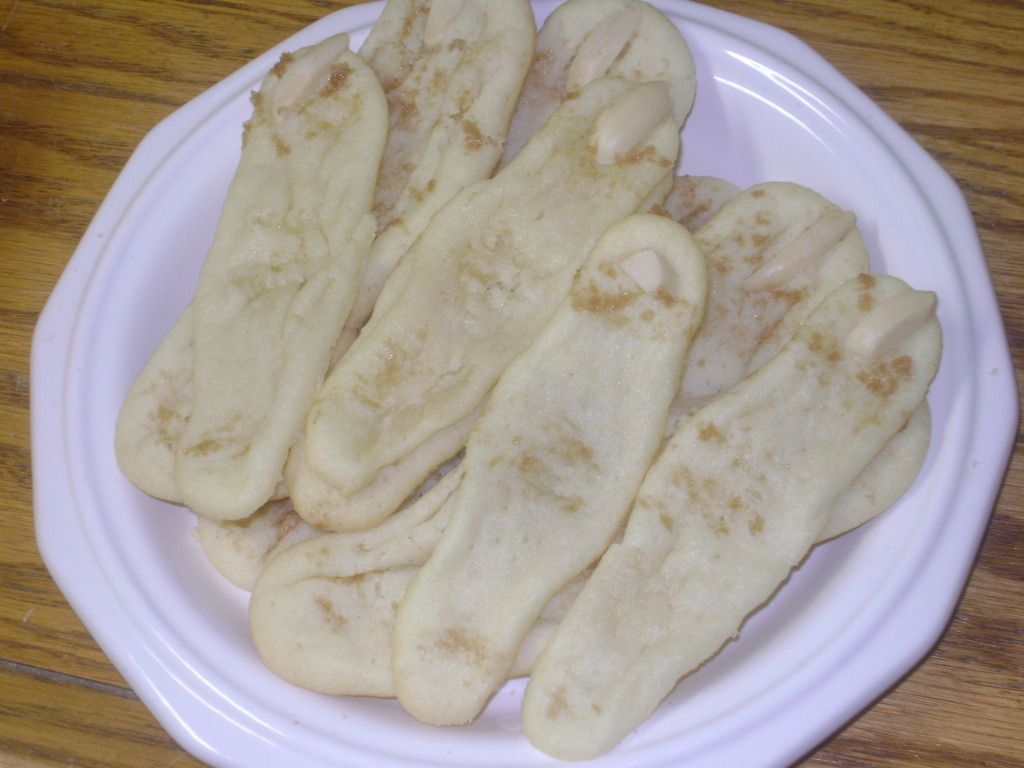
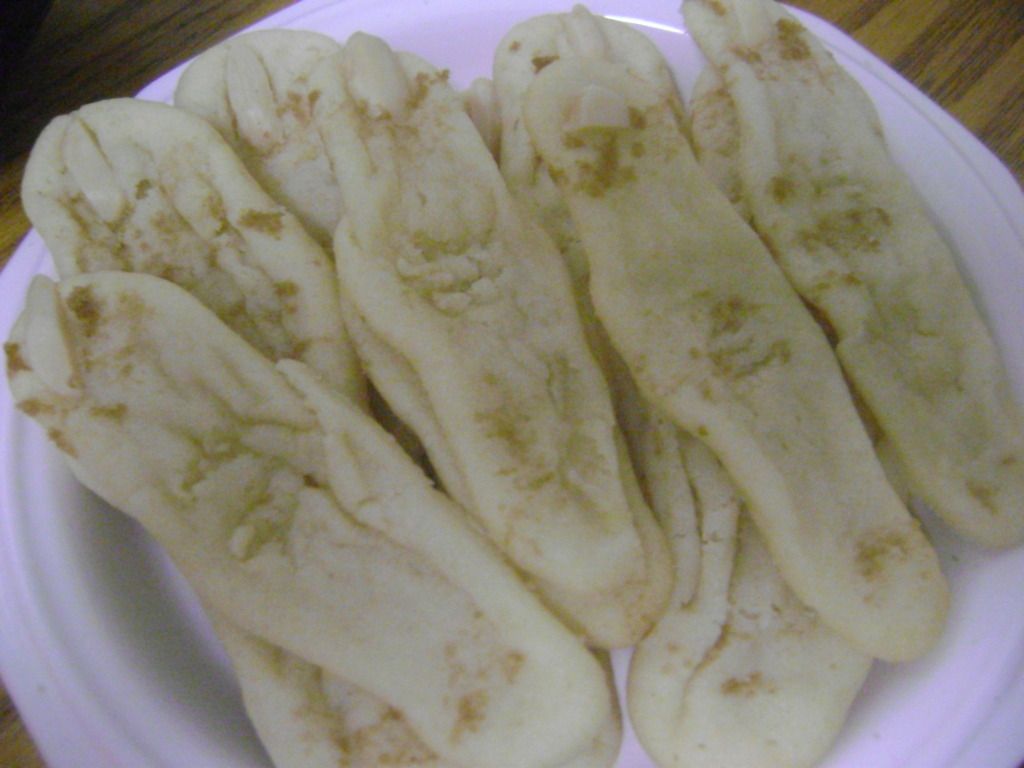
Step 5: Take the brown sugar and put in around the scored nail beds, knuckles, etc. to make the finger look dirty.

Step 6: Place in oven and bake according to the cookie dough instructions.


Photobucket


Now you have your own delicious fingers to serve! Your Halloween guests will be impressed with your trendy food choice.

Photobucket

Friday, October 12, 2012

Playing with Your Food!

(By Lindsey Riley, The Crafting-Challenged Blogger)

Earlier this week, there was a recall on Kelogg's Mini-Wheats cereal for fear of metal fragments being present in boxes. It sounds like there was a faulty mechanism and there was a possibility that metal was packaged with the food.

Personally, I am never awake to eat breakfast food. I also am not a big fan of cereal, but I do love cereal boxes. I love walking down the grocery store aisle for cereal because there are hundreds of colorful boxes lining the shelves. All of them grab your attention one way or another, and I think that it's just cool. I know, I am strange!

As a child, I use to make various crafts with cereal and cereal boxes. Every year in elementary school, my mom and I would make a little mailbox out of the cereal box for my classmates to drop my Valentines cards in. I used to make play jewelry out of Cheerios and yarn and would then leave them outside for the wildlife to enjoy. Those were the days!

There's way more that you can do with cereal and its boxes these days than I ever imagined. You can do little things like make mosaics, postcards, and organizers. It's a great way to be green. Other ideas include:

Bookmarks
  • You need: A cereal box, scissors, one sheet of clear plastic contact paper, a hole punch, and a small amount of yarn or ribbon.
  • Open the bottom of the box and cut down one side so the box can lie flat. Use a pen or marker to trace the shape and size bookmark you want.
  • Then, after the bookmark has been cut out, seal it with contact paper. The plastic coat will making it more durable.
  • Decorate with your favorite designs!
 Sandals
  • What you need: Empty cereal box, scissors, pencil, duct tape
  •  Cut out the shoe shapes and straps. Tape the straps with the duct tape. Decorate as you wish!
 Beads
  •  What you need: Cereal box, scissors, varnish
  • Cut the flat sides of the boxes into thin and long triangles.
  • Roll the cardboard and then dip final product into varnish.

Wednesday, October 10, 2012

DIY mugs and coffee cake before winter sets in

By Britny [self-proclaimed craft freak]

After  being sick for almost two weeks I am just about caught up on everything except of course this blog. I'll be putting up one for this week on Thursday, but to apologize to you all I'm including two crafts- yay you! First thing is first though, some daily knowledge to go with the craft.

Last year in America we had one of the weirdest winters in a long time. It was oddly warm and barely snowed in some areas that usually get a pretty decent amount of snow. It was the fourth warmest winter in recorded history and one of the least snowy according to ESPN Action Sports. Forecasters are predicting El Nino to set in this winter which would cause the northern and western areas in the United States would have milder and drier than normal weather while the eastern and southern areas will have colder and wetter weather according to Mike Steinberg, meteorologist for Farmer's Almanac. Some meteorologists are also forecasting for the winter-like weather to hit earlier than normal according to an article by the Huffington Post. Just like the weather changes though, so do the predictions.

To prepare you for the cold, or at least somewhat colder weather, I've decorated some lovely mugs that I'd like to share with you along with an awesome recipe for single coffee cakes!

Decorative Mugs

      Materials:
  • mugs [I bought some plain ones from Goodwill]
  • Sharpies
  • ID: solid stick [I got this from Hobby Lobby for about $4.]
      How To:
  • Pick a mug and set your oven on 400*F.
  • Using Sharpies decorate your mug.


  • Use the ID: solid stick and lightly go over your decorations. This is like a coating for it. Don't wipe it or it'll smear.
  • Put the mugs on a cookie sheet bake for 15 minutes. Let them cool once they're done.

 Coffee Cake

I got this recipe off of Pinterest from Prudent Baby. The only thing I added to her recipe is the cinnamon sugar because I felt like it needed more cinnamon.

      Materials
  • A MUG [maybe the one you just decorated :) ...hint hint]
  • 1 tbsp butter
  • 2 tbsp sugar
  • 1 egg
  • 2 tbsp sour cream
  • vanilla extract
  • 1/4 cup flour
  • 1/2 tsp baking powder
  • 2 tsp cinnamon sugar

AND for the yummy topping you'll need the following:
  • 1 tbsp butter
  • 1 tbsp flour
  • 1 tbsp brown sugar
  • 1 tsp cinnamon

  • Place the butter into the mug and warm it for 8 seconds, just so it's softened.
  • Add the rest of the ingredients. You don't need to use all of the egg, only about half so maybe make another single coffee cake for your significant other!

  • Mix all the toppings in a seperate container and then put it on top of the mixture inside the mug.
  • Put the mug in the microwave for 1 minute and 20 seconds and ta-da, the best coffee cake ever is now all yours!

    All That Glitters is NOT Gold... It's Pink, Too!

      
    By: Mandy Whitaker

        The 2012 AMA nominations were announced on October, 9, 2012, by Christina Aguilara.  The AMA's will air on November 18, on ABC.  Artists of the year nominations include: Justin Bieber, Drake, Maroon 5, Katy Perry, and Rihanna.  Click here, for a full list of nominations.
     
         What better way to tie in my love for glitter than a night full of glamour, glitter, and beautiful people? I wanted to start off simple, but not lacking in beauty with tons of glitter! And when I mean "tons of glitter" that is truly what I mean. 
      
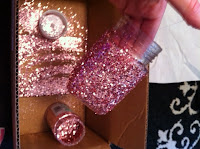
         I decided I wanted to make a little decorative jar covered in pink glitter!! Super simple, but equally as cute! A perfect addition to any room!

    I purchased all these items at Hobby Lobby.

         I started off with a glass jar, glitter, and glue that adheres especially to glass! (Just read the labels, it will tell you whether the glue will stick to glass!)

                                                           Make sure to have a box or tray as your working space or you will end up with glitter EVERYWHERE! (Not that glitter everywhere is entirely a bad thing.)

    Start by taking off the lid of the jar and begin painting on the glue. Let the glue sit for a moment until it's tacky. 

    Then comes the fun part.  Pour glitter onto the jar and spread it around all over the glue.  Make sure every last inch is covered, we want this to be GLITTER CITY!!

          Let the glue dry and put the lid back on! For best results, place your newly glittered jar by a light source to make it sparkle! (I placed mine by pink Christmas lights.)

    And Voila!  You added a touch of glamour to your room!

    Easy but cute, right? Just like I promised!