Wednesday, November 28, 2012
Sunday, November 25, 2012
It's Beginning To Feel A Lot Like Christmas!
By Lindsey Riley (Crafting Challenged Blogger)
Hey everyone!
With Thanksgiving and Black Friday weekend ending, it means only one thing: We are less than thirty days away from Christmas Eve!
Now not everyone celebrates Christmas, and that is totally fine. Personally, my favorite part of the holiday and the winter season in general is the Christmas tree my family puts up. I hate going to get the tree (a family tradition that my father never let's me forget), but I do enjoy decorating it and placing gifts at its base.

This year, as a pre-Christmas present, I made my parents some ornaments. I told them to consider it my contribution to the tree this year since I'll be at school when they chop it down and decorate it.
Much to my surprise, making these ornaments was very easy. Here is what I did:
- Went to Hobby Lobby (you can go to any craft store) and bought clear and blank ornaments (two packages of 12 for $7.99)
- Went to JoAnn Fabrics (again, you can go to any craft store) and bought ten different paint colors ($1.25 each)
- Go to your crafting area, lay out some newspaper on a table, and get all your materials ready (paint, ornaments, paper towels, paper plates)
- Mix whatever color combinations you wish inside of the ornaments and with your finger covering the opening, shake them until all sides are covered. When covered, place upside down on a paper plate so paint can drain out. (Repeat for all ornaments)
- Let them dry overnight
- After wiping them down and getting the extra paint out, place the ornament tops and hooks back on
- Package them in whatever way you wish (Personally, I used a gift box and tissue paper)

We're All a Bit "Nuts" Sometimes
By: Mallory Jordan, moderately crafty
Recently, a Canadian mom has been making news. Her (in my opinion) overreactive actions have caused a rift among people with peanut allergies.
According to thestar.com, the Vaughan mother, Donna Giustizia, wants the oak trees near her child's school to be cut down. She believes that fallen acorns from the tree could harm her child or others with peanut allergies if they some how come in contact with the acorns.
The SUN News in Canada's City of Vaughan put their own social media reporter, Gina Phillips, on the line to prove Giustizia is not only wrong, but a little "nuts." Phillips has an extreme peanut allergy and reporter David Menzoid brought her in contact with the nut in question.
Menzoid and Phillips proved that acorns do not harm those with peanut allergies.
“When it comes to nature, that’s super hard to control. I mean there’s gotta be a line somewhere, right," Phillips said.
In my opinion, parents get more and more protective in a negative way each generation. Children need to be outside around trees and nature. It is part of life.
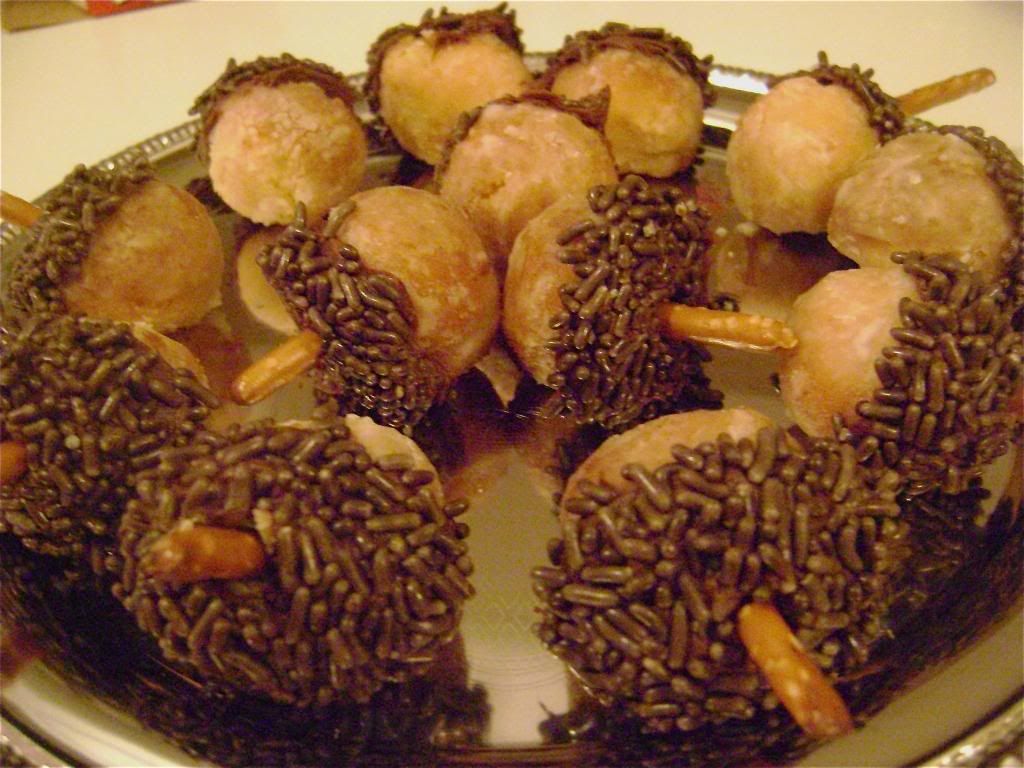
In honor of this "nuts" woman, I thought I'd make a cute mini dessert: Acorns!
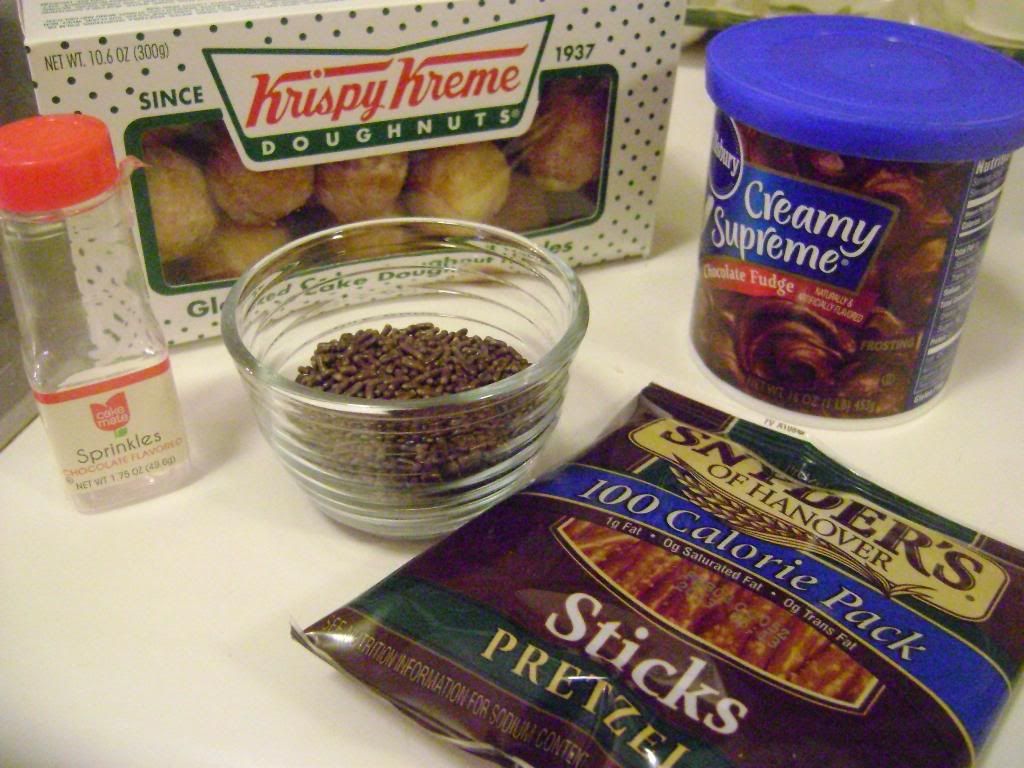 You will need:
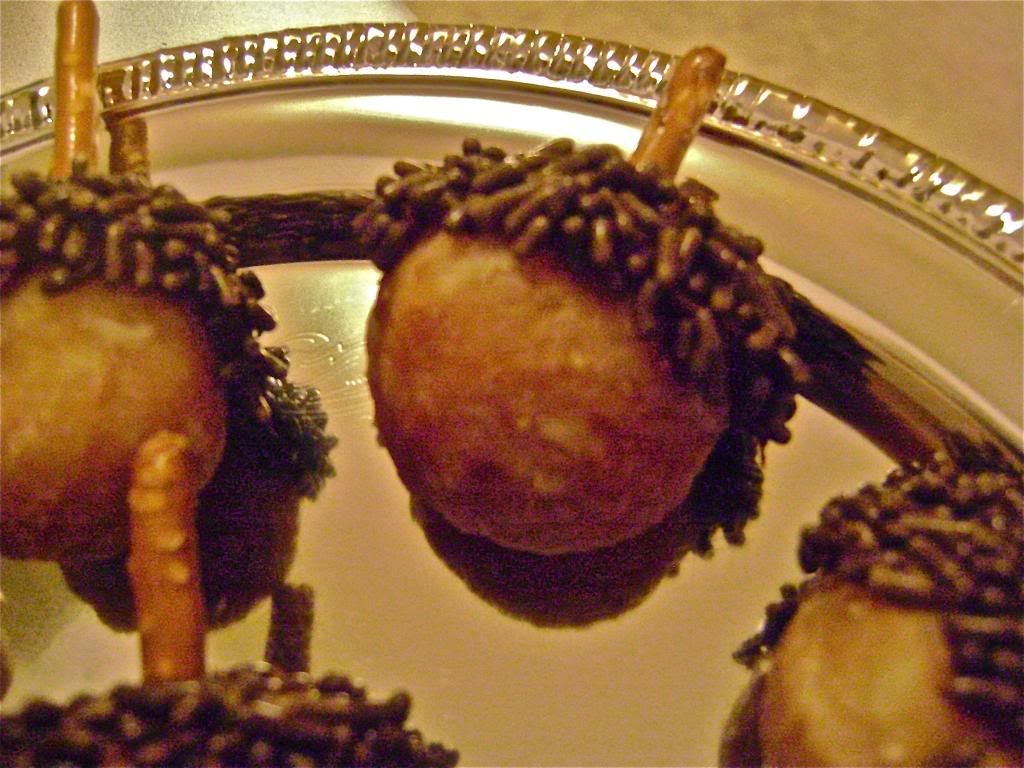
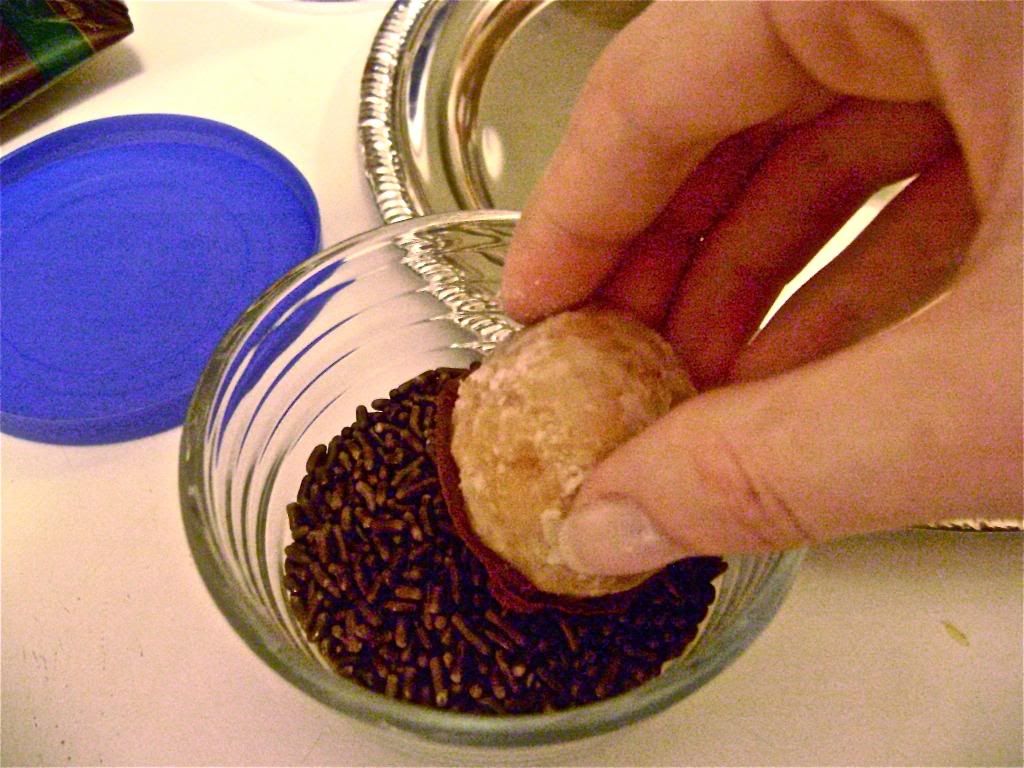 This recipe is quite simple. You just use a knife to spread some icing on the top 1/3 of the donut hole. You pour the sprinkles in a small bowl so that the icing-covered acorns are easily dip-able. Then, you dip the icing top of the donut hole in the sprinkles. Finish with a thin pretzel stick in the top for the stem.
Super easy, super delicious and super cute. Also, no peanut allergies should be at risk.
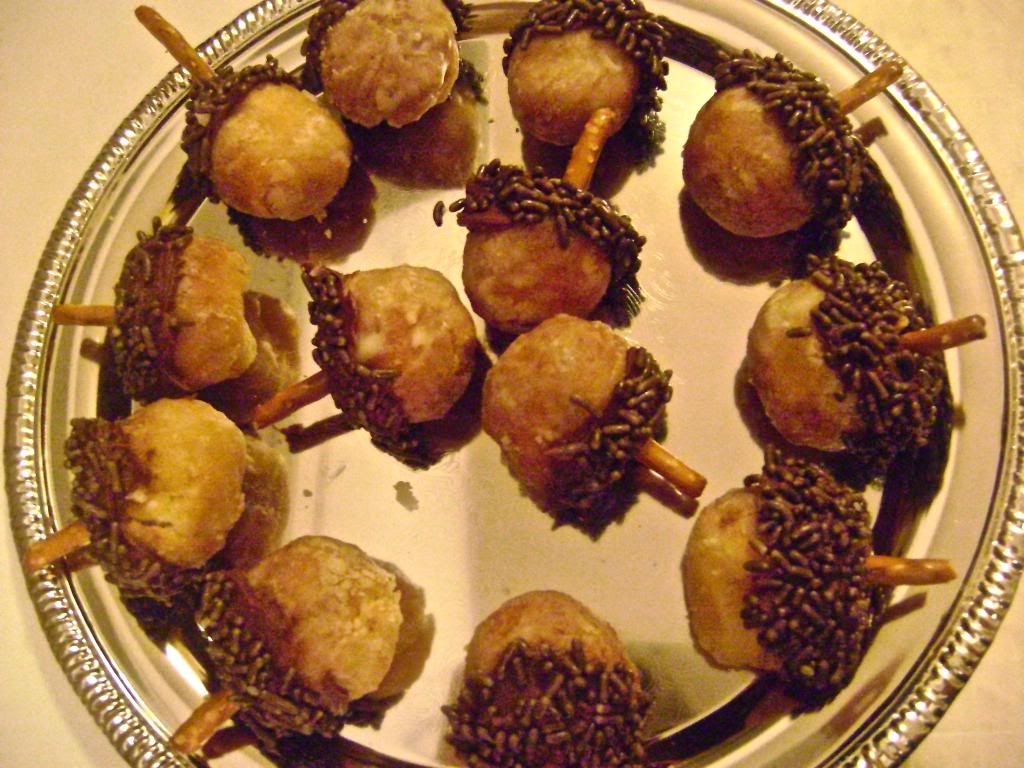
Someone should make these and bring them to Giustizia's next get together. Needless to say, I don't think any oak trees will be chopped down and people with peanut allergies will be safe.
As Menzoid said, he is all for helping those with peanut allergies, but, "When it comes to chopping down beautiful, magnificent oak trees, I'm sorry, that's just nuts."
Recently, a Canadian mom has been making news. Her (in my opinion) overreactive actions have caused a rift among people with peanut allergies.
According to thestar.com, the Vaughan mother, Donna Giustizia, wants the oak trees near her child's school to be cut down. She believes that fallen acorns from the tree could harm her child or others with peanut allergies if they some how come in contact with the acorns.
The SUN News in Canada's City of Vaughan put their own social media reporter, Gina Phillips, on the line to prove Giustizia is not only wrong, but a little "nuts." Phillips has an extreme peanut allergy and reporter David Menzoid brought her in contact with the nut in question.
Menzoid and Phillips proved that acorns do not harm those with peanut allergies.
“When it comes to nature, that’s super hard to control. I mean there’s gotta be a line somewhere, right," Phillips said.
In my opinion, parents get more and more protective in a negative way each generation. Children need to be outside around trees and nature. It is part of life.
In honor of this "nuts" woman, I thought I'd make a cute mini dessert: Acorns!
You will need:- Regular donut holes
- Chocolate icing
- Brown or tan chocolate sprinkles
- Small, thin pretzel sticks
This recipe is quite simple. You just use a knife to spread some icing on the top 1/3 of the donut hole. You pour the sprinkles in a small bowl so that the icing-covered acorns are easily dip-able. Then, you dip the icing top of the donut hole in the sprinkles. Finish with a thin pretzel stick in the top for the stem.Super easy, super delicious and super cute. Also, no peanut allergies should be at risk.
Someone should make these and bring them to Giustizia's next get together. Needless to say, I don't think any oak trees will be chopped down and people with peanut allergies will be safe.
As Menzoid said, he is all for helping those with peanut allergies, but, "When it comes to chopping down beautiful, magnificent oak trees, I'm sorry, that's just nuts."
Sunday, November 18, 2012
The Perfect Macy's Thanksgiving Day Parade Breakfast
By: Mallory Jordan, moderately crafty
If you're like me, Thanksgiving break means sleeping in really late and eating a ton of food. However, that plan has a major flaw on Thanksgiving Day. If I sleep past noon, I'll miss one of the most important parts of celebrating Thanksgiving: The Macy's Thanksgiving Day Parade.
The Macy's Thanksgiving Day Parade has a long and important history. As NYC Tourists explains, the first parade was on Christmas 1924. The Macy's employees were originally the entertainment in the parade. The parade got bigger, adding the famous giant balloons in 1927, and more popular thanks to television. Today, about 3.5 million people stand along the 2 1/2 mile route every Thanksgiving Day.
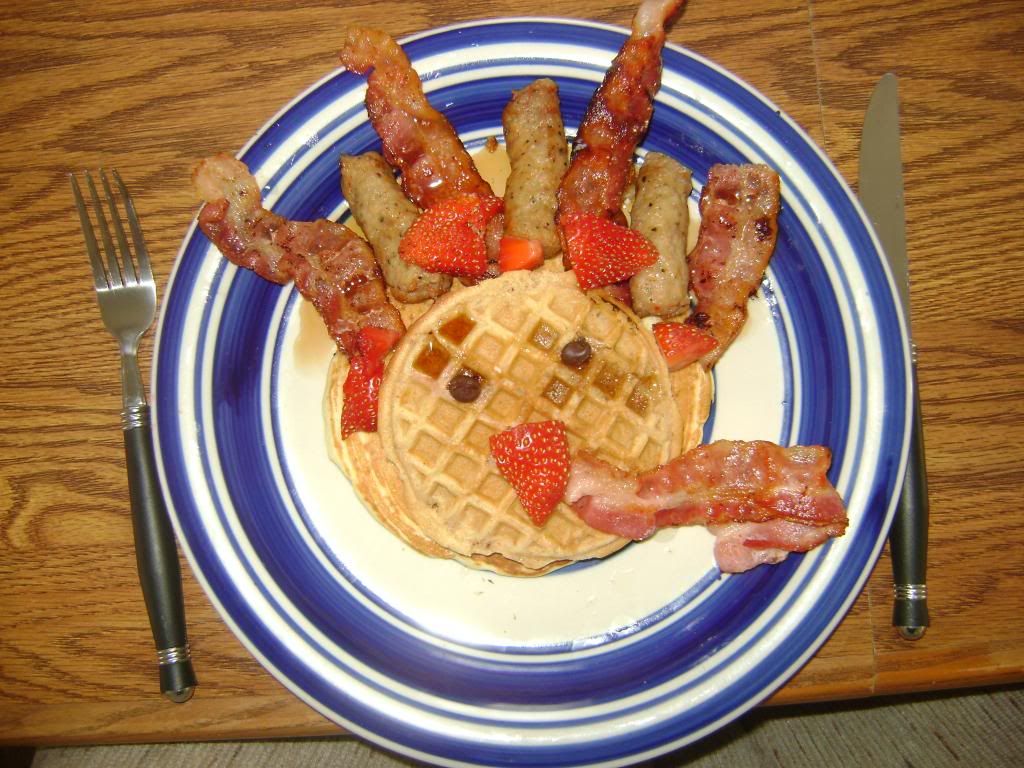
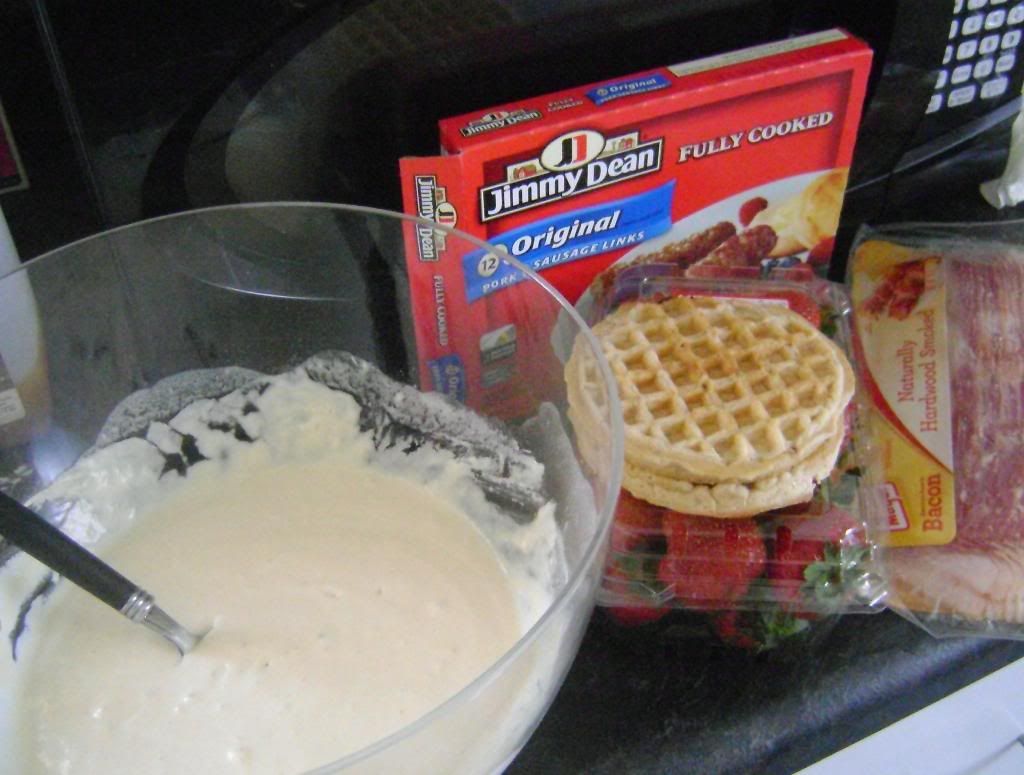
If you've missed the Macy's Thanksgiving Day Parade due to sleeping in, or have trouble waking up loved ones for it, I have a solution. Whip up some 1950's housewife skills and get up a little earlier than normal to make the perfect parade breakfast. Hint: It doesn't taste like turkey, but it sure looks like one.
You will need:

The Macy's Thanksgiving Day Parade has a long and important history. As NYC Tourists explains, the first parade was on Christmas 1924. The Macy's employees were originally the entertainment in the parade. The parade got bigger, adding the famous giant balloons in 1927, and more popular thanks to television. Today, about 3.5 million people stand along the 2 1/2 mile route every Thanksgiving Day.
If you've missed the Macy's Thanksgiving Day Parade due to sleeping in, or have trouble waking up loved ones for it, I have a solution. Whip up some 1950's housewife skills and get up a little earlier than normal to make the perfect parade breakfast. Hint: It doesn't taste like turkey, but it sure looks like one.
You will need:
- Pancake mix
- Waffles (I prefer cinnamon)
- Bacon
- Sausage
- Strawberries
- A couple chocolate chips (and whipped cream if you desire)
- Syrup (optional)
First, cook up 5 pieces of bacon per serving and 3 sausages per serving.
Then, prepare the pancake mix and make 1 pancake at a time so it is larger than the waffle and perfectly round.
Thirdly, slice a strawberry in half, then in half again for the beak. Chop up a few more strawberries to add to the "feathers."
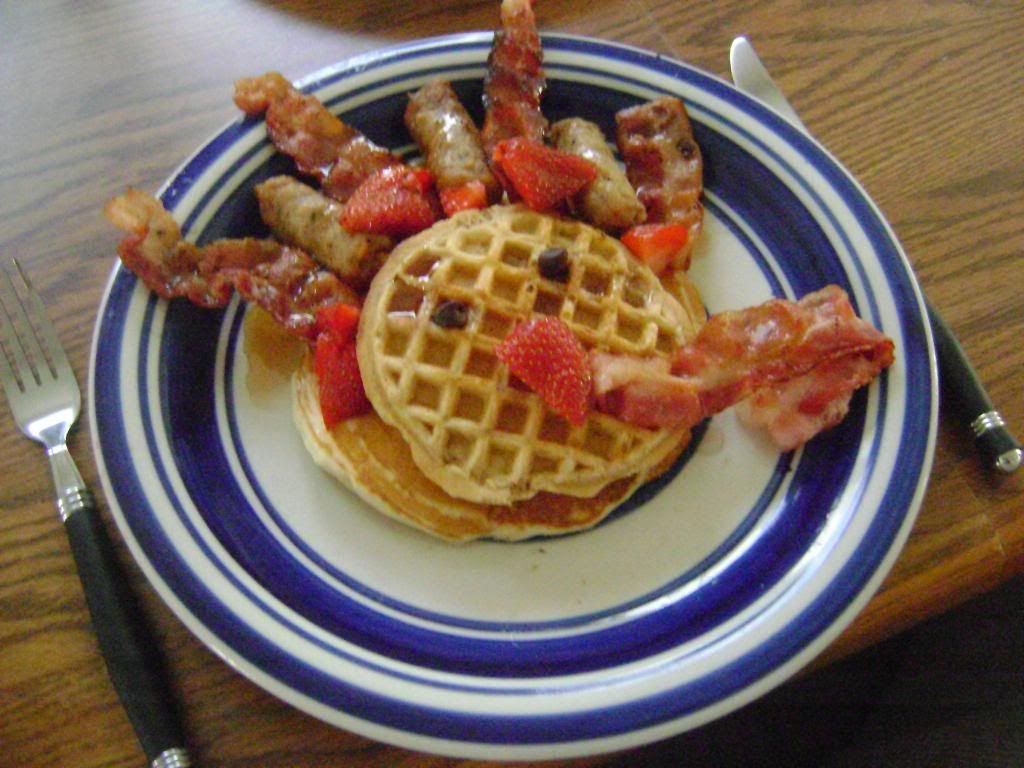
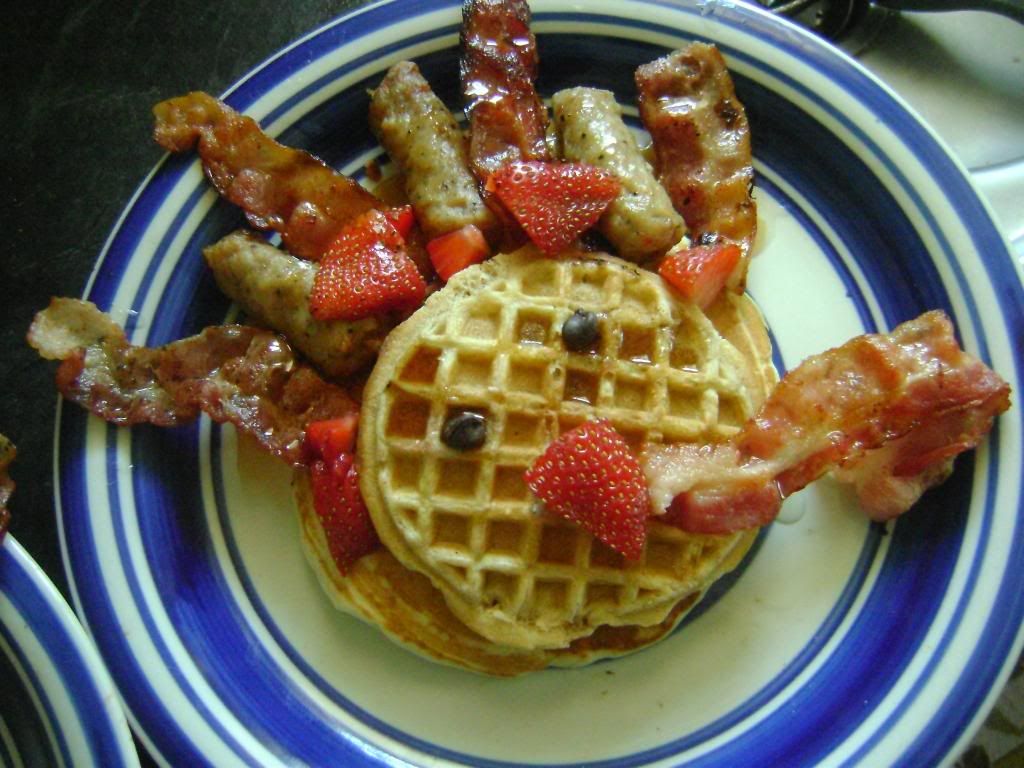
The pancake will go on the plate first with the waffle on top. Make sure the waffle is positioned on the bottom so that the pancake peaks out above. The pancake will be the body of the turkey, and the waffle will be the head.
Alternate 4 of the bacon strips and 3 sausage links above the waffle on the top of the pancake. Put some strawberries along the top edge of the waffle or at the base of the "feathers" to add some color. On the waffle, put 2 chocolate chips on for eyes. Place the first sliced strawberry cut on the waffle for the beak. Take the last piece of bacon an put it to the side of the strawberry beak for the turkey's gobble.
Friday, November 16, 2012
Bye Bye Twinkies!
In case you haven't heard already, Hostess is closing its doors. Why would it do that after producing such popular snacks like Twinkies? According to an article from ABC News:
Unfortunately, Twinkies and all those delectable treats will never be the same again. And if you want an original, be prepared to pay tons of money for it. They are selling on eBay for as much as $8,000!!!!"Hostess Brands Inc., the maker of the spongy snack with a mysterious cream filling, said Friday it would shutter after years of struggling with management turmoil, rising labor costs and the ever-changing tastes of Americans even as its pantry of sugary cakes seemed suspended in time.
Some of Hostess beloved brands such as Ding Dongs and Ho Ho's likely will be snapped up by buyers and find a second life, but for now the company says its snack cakes should be on shelves for another week or so. The news stoked an outpouring of nostalgia around kitchen tables, water coolers and online as people relived childhood memories of their favorite Hostess goodies."
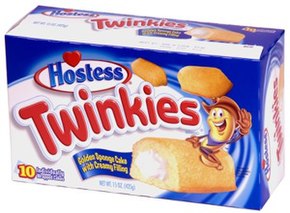
If you manage to snatch a few of the last Hostess treats before the business closes, here are a great ways you can enjoy them:
FRY THEM!!
- 6 Hostess Twinkies
- 6 wooden popsicle sticks
- vegetable oil, enough to cover twinkies
- flour
- BATTER
- 1 cup milk
- 2 tablespoons vinegar
- 1 tablespoon oil
- 1 cup flour (mix to consistency)
- 1 teaspoon baking powder
- 1/2 teaspoon salt
- Directions:
- Freeze the twinkies for at least 2 hours.
- can freeze overnight.
- Heat your oil in fryer to 375 degrees.
- Mix your batter as such: milk, vinegar,oil.
- In another bowl blend flour, baking powder and salt.
- whisk wet ingredients into dry, mix until smooth.
- refrigerate until oil reaches temperature.
- insert sticks into twinkies, leaving enough of a end to hold.
- dust with flour and dip into batter be sure batter covers the entire twinkie place twinkie in hot oil with utensil being sure the twinkie browns evenly (the twinkie will float) about 3- 4 minutes.
- Remove to paper towel- cool 5 minutes.
Option 2: Simply unwrap the package and enjoy!
Thursday, November 15, 2012
A Charlie Brown kind of Thanksgiving
Britny Burton [self-proclaimed craft freak]
Jelly beans, popcorn, toast, pretzel sticks, need I say more?
 Grocery List
1. Pop the popcorn. You can pop kernels on the oven, a popcorn popper, a microwave bag, etc. It doesn't really matter. I would suggest a little to no butter kind so it doesn't leave grease spots on the bag.
2. Pour all of the popcorn into the brown paper bag. If you use small lunch bags then each person will have their own turkey to open or else you can put it all in a big brown grocery bag and they can share one turkey. Below is what it looks like once the kids dig into the bag!

3. Toast the bread. If you want to jazz it up you can even put some toast toppings out such as cinnamon, jelly, honey, etc.
4. Place the jelly beans and pretzel sticks in containers. [This is so everyone has to pass the containers around and share!]

And ta-da your Charlie Brown Thanksgiving is a success!
**Does your family have any Thanksgiving traditions like watching A Charlie Brown Thanksgiving together? Let me know in the comments section below!
Jelly beans, popcorn, toast, pretzel sticks, need I say more?
Usually for Thanksgiving my mom pulls out A Charlie Brown Thanksgiving and makes us watch it. This year I won't be home for Thanksgiving, but that's no reason to not be in the Charlie Brown spirit. I thought it would be fun to make a replica of his Thanksgiving. This would be a great idea for an afternoon with little kids or even for big kids like my roommate and myself!
If you're doing this with kids it's easiest to have them watch the movie while you set everything up. Not only are the cartoon characters able to keep children engaged, the movie also teaches about sharing and some traditions of Thanksgiving.
Grocery List- bread
- butter
- popcorn
- large brown paper bag OR
- smaller brown lunch bags
- yarn or ribbon
- jelly beans
- small pretzel sticks
Honestly, most of the food for this I already had in my kitchen, so it's really a quick project.
2. Pour all of the popcorn into the brown paper bag. If you use small lunch bags then each person will have their own turkey to open or else you can put it all in a big brown grocery bag and they can share one turkey. Below is what it looks like once the kids dig into the bag!

3. Toast the bread. If you want to jazz it up you can even put some toast toppings out such as cinnamon, jelly, honey, etc.
4. Place the jelly beans and pretzel sticks in containers. [This is so everyone has to pass the containers around and share!]

And ta-da your Charlie Brown Thanksgiving is a success!
**Does your family have any Thanksgiving traditions like watching A Charlie Brown Thanksgiving together? Let me know in the comments section below!
Monday, November 12, 2012
Anniversary Road Trip
By: Mallory Jordan, moderately crafty
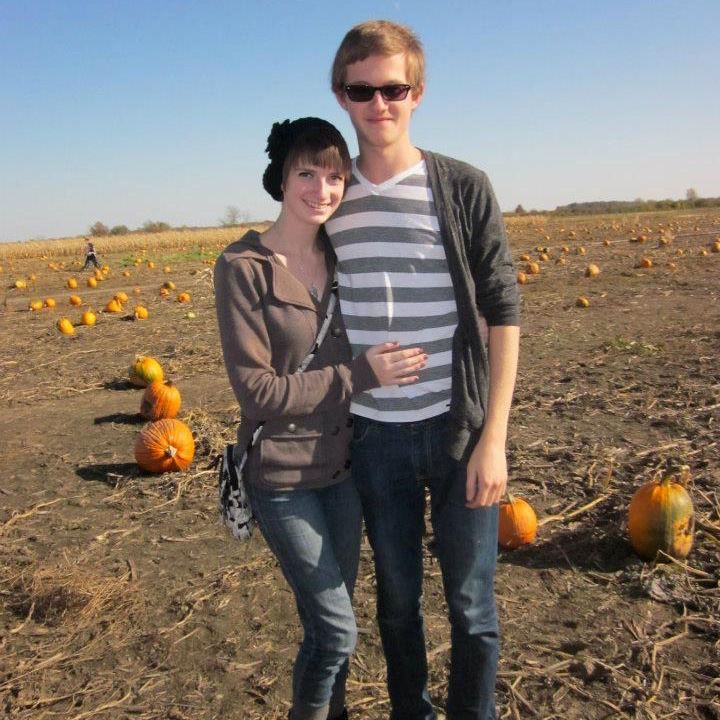 November is a very exciting month for me. Not only because I celebrated my birthday with my last post; but, because exactly one week later I have another personal news story to blog about. Today is my 1 year anniversary with Mr. Justin Tillery. I am very giddy today because we are both celebrating our longest and most meaningful relationship. So, bear with me with the self-centered posts. After this week, I will go back to being more news worthy with my crafts.
Men are sometimes hard to buy for. Women have stereotypical gifts that most of us like such as perfume, lotion, candy, flowers, jewelry, a nice dinner and the list goes on. Men tend to be slightly more picky in the gift department. When I was struggling with what item I could get Justin that is both meaningful and something he would like, I remembered one of my mom's many mottos: sometimes the best gift is going and actually doing something to make new memories on a special day.
Last spring semester, Justin was in London for a study abroad program for 3 months. During that time, he visited Germany and the famous Hofbrauhaus. He bought his dad a Stein Maß beer mug and he has wanted one every since. Lucky for me, not only is there a Hofbrauhaus now in Chicago (a 4 1/2 hour trip), but now there is one 2 1/2 hours away in Newport, Kentucky! Although I knew the one in Kentucky would not be as awesome as Hofbrauhaus in Germany, I took a chance. The Newport Hofbrauhaus still has great reviews and we loved it!
There are a lot of fun things to do around the Newport Hofbrauhaus, so I made a small Google Map to chart out where our anniversary adventures could take us. That way, we could make a nice day out of our trip.
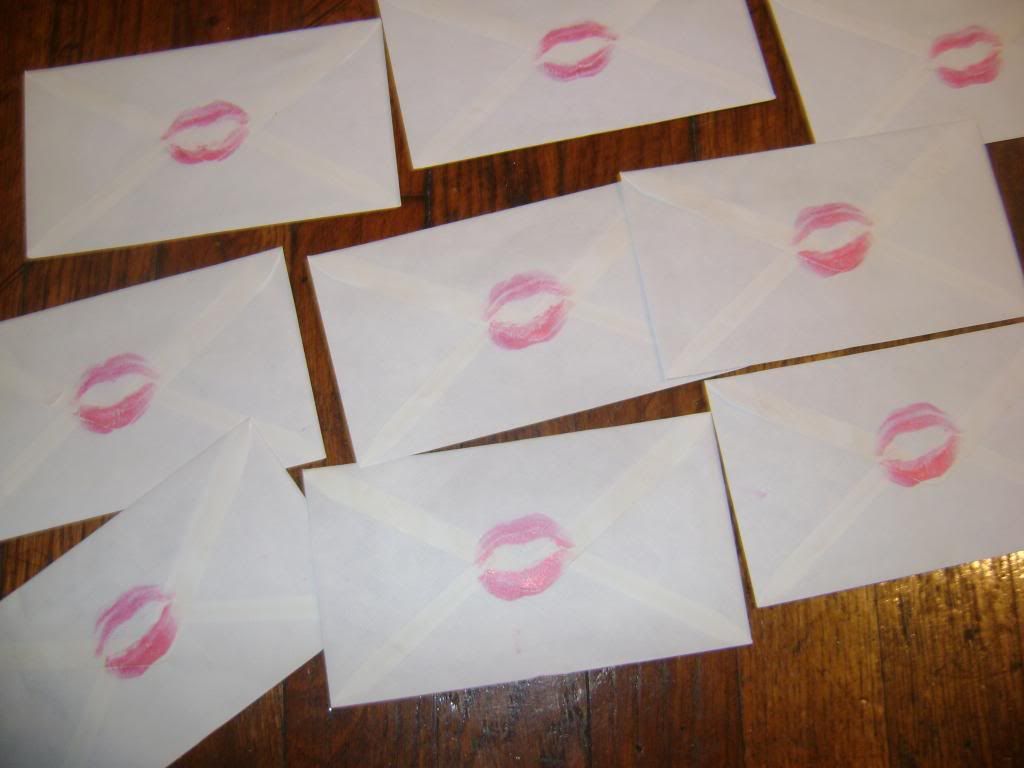
I took us there on Saturday and bought drinks and Justin his own beer mug. Naturally, I had to use my crafty skills to make the trip a little extra cute and special. For some reason, Justin loves trying to guess what his gifts are. So, I made a game out of it. The 1 year anniversary is the year of paper gifts. Although there are many different ideas for 1 year gifts, I had my own already planned.
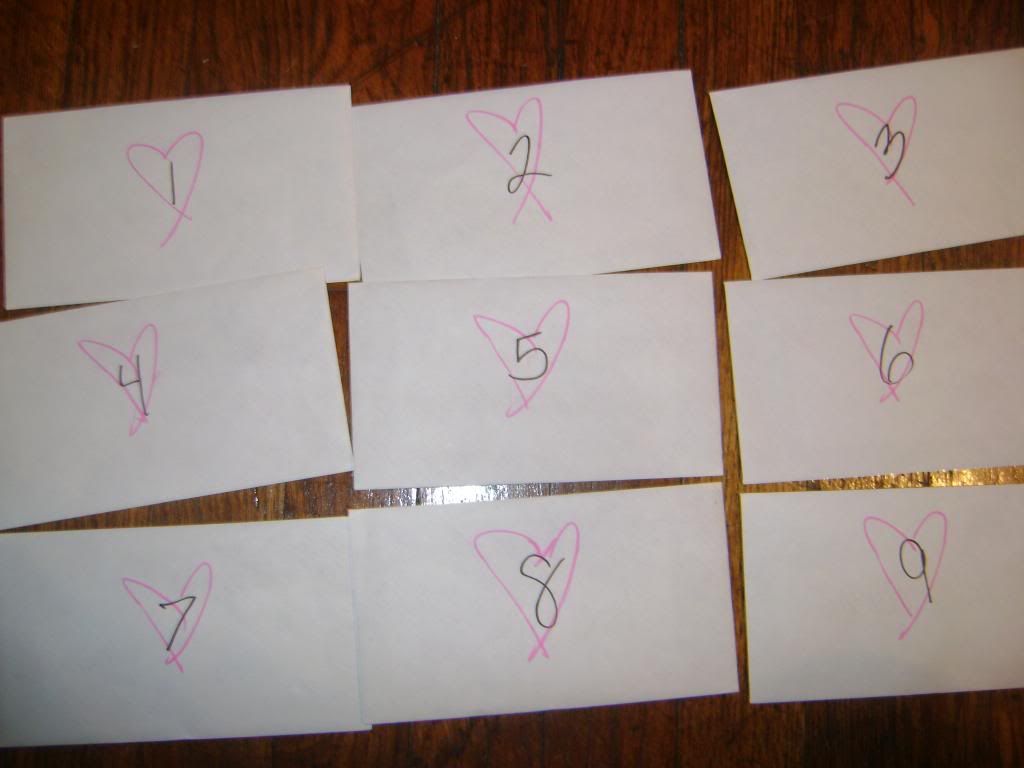
Justin knew we were going on a special road trip, but I didn't tell him where. I decided to make 9 clues that got progressively easier. He got one every 12 miles of the trip to help him guess where we were going. I wrote the clues in cursive and added some heart details to be mushy about it.
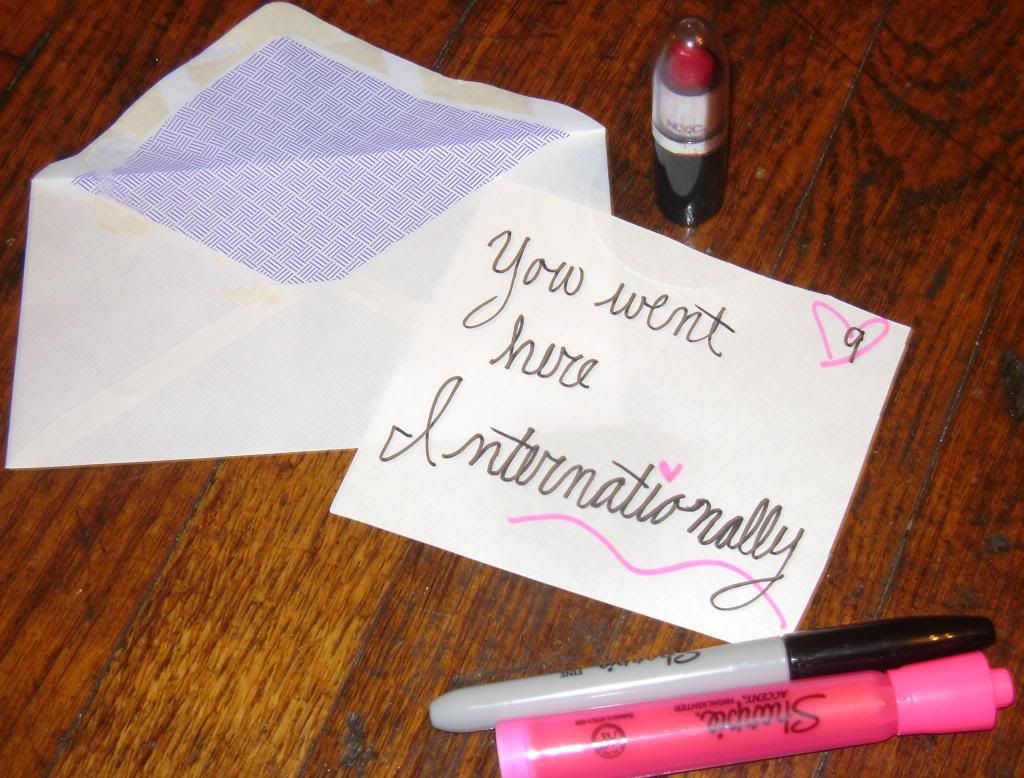
Wait, this picture is missing something. You need to seal it with a kiss!

The first clues were very vague clues about the city we were going to. For instance, the first clue was that we were traveling south. The last clues were more specific about the place. I made sure to seal each of the envelopes with a kiss and number the outsides accordingly.
Overall, it was a great day. Not only did Justin get a present, but we got to make more memories together and he had the fun of guessing along the way.
Wednesday, November 7, 2012
Pinterest Party!
By Lindsey Riley (The Crafting Challenged Blogger)
Hello everybody! Let's get the crafting ideas flowing so that this weekend, you can start making those holiday presents.
Last weekend, I went to Indianapolis with my friend Ashley to stay at her house and get away from the craziness of college for a few days. Her mom, a very sweet and avid crafter, planned a Pinterest party for this same weekend. She wanted members of her family and their friends to come together, relax, and have fun creating those projects that they never had the time to do.
Everything at this party was inspired by Pinterest. She made dishes that she found through Pinterest and planned a few crafts for everyone to do together that she found on Pinterest. Here are a few photos of what I made and links to instructions and recipes on how to make the crafts and food.
Let's inspire each other: What Pinterest craft do you want to make but don't have time for? Comment below with your answer.
 |
| http://www.verybestbaking.com/recipes/139486/peanut-butter-cheese-ball/detail.aspx |
 |
| http://www.craftytexasgirls.com/2012/07/christmas-in-july-sharpie-plates.html |
 |
| http://www.cafemom.com/group/113532/forums/read/15042140/Fall_Crafts_Challenge_Day_6_Show_Us_Something_with_Pumpkins?next=51#replies |
 | ||
| http://www.tasteofhome.com/recipes/Chicken-Taco-Ring |
Tuesday, November 6, 2012
Election Day and a Room Makeover
By: Mandy Whitaker
Hope ya'll are doing well!
Everyone who is eligible to vote, better have! Troops died for our freedom to vote, so you best not take it for granted!
Anyways...
The two presidential canidates are Barack Obama(D) and Mitt Romney(R) with vice presidents Joe Biden(D) and Paul Ryan(R).
Regardless of who you voted for, none can deny the dreamboat that is Paul Ryan. Am I right?
But, the candidates above aren't the only ones! Don't forget: John Gregg (D) and Mike Pence (R) for governor and Joe Donnelly (D) and Richard Mourdock(R) for the Senate.
These canidates are for the state of Indiana. To see more information on Indiana elections or your home state click here.
ABC has a live update of the 2012 election. It is actually quite interesting, you can see Donald Trump voting and his claim that it's his "real hair." I beg to differ....
So, enough with all the election craziness!
How am I relating the election to room decor, you ask?
Well, if your presidential choice did not come out on top, and you feel like packing up and running for the border, makeover your room instead!
Stretching it? Yes.
The following will show you how my room is set up, decorated, and organized, and hopefully will give some ideas on how you can makeover your room!
WARNING: This post is going to be a little picture heavy, but that's only because my entire room is pink, so I got a bit wild taking pictures!
Being a college student, it's hard to make your room look how you truly want it. In my apartment, it has commercial grey carpeting and plain white walls that we aren't allowed to paint. So, I had to make the most of it, and I think I did a pretty good job! (For my decorating style, at least.)
The first picture is an overview of my room. As you can see, lots of pink. But, underneath my bed, I have large totes to keep many of my t-shirts, sweats, and sweatshirts. I also have one that has my lesser fancy shoes in. (Fancier shoes shown later) This actually cleans up much of the clutter that would be around my room because the totes just slide right under my bed! Also, you can see just the corner of a black rug I have in my room. This obviously makes the grey carpet less ugly.
 Here is my vanity and just a word of caution, I am a beauty product fanatic, as you will see. The top white drawers and pink drawers are my makeup, while the bottom pink drawers are my skincare products, extra backup products, and other hygiene related items. As you can see, my makeup brush holders from my previous post, are still being used. It's a perfect way to keep my brushes organized.
.JPG) I organize my makeup drawers into product type. For example, this draw contains bronzers and highlighters. This makes things easy for me to find things when I am looking for a certain product. A tip for organization, in my actual vanity drawer I use an office supply holder to organize my makeup. (I got this pink one from Wal-Mart a long time ago.) It works perfect to separate different makeup products and holds eyeliners and mascaras very well as seen here.
I organize my makeup drawers into product type. For example, this draw contains bronzers and highlighters. This makes things easy for me to find things when I am looking for a certain product. A tip for organization, in my actual vanity drawer I use an office supply holder to organize my makeup. (I got this pink one from Wal-Mart a long time ago.) It works perfect to separate different makeup products and holds eyeliners and mascaras very well as seen here.
.JPG)
.JPG)
To keep my wristlets in one place I hang them on this cute hook I bought at Hobby Lobby for under $2. It also is a good place to hold my keys because I am notorious for losing them in my room!
.JPG) A quick look at my closet. Again, living in an apartment, you may not have much room to hang your clothes. I actually bought a separate bar that hangs from the original bar to hang my jeans and skirts. It works perfect and instantly creates more room in my closet! Also, you can see in the lower left-hand corner that I keep all my flip-flops in a pink milk crate. (Wal-mart, around $5) I put my fancier shoes on the shelf above my clothes because I feel that they are sort of a decoration all on their own. It keeps both pairs together and the sparkle looks cute on display!
A quick look at my closet. Again, living in an apartment, you may not have much room to hang your clothes. I actually bought a separate bar that hangs from the original bar to hang my jeans and skirts. It works perfect and instantly creates more room in my closet! Also, you can see in the lower left-hand corner that I keep all my flip-flops in a pink milk crate. (Wal-mart, around $5) I put my fancier shoes on the shelf above my clothes because I feel that they are sort of a decoration all on their own. It keeps both pairs together and the sparkle looks cute on display!
.JPG)
.JPG)
The hounds-tooth pillow on my chair was actually made to match the stool of my vanity. The stool on my old vanity was plain white, but I think changing it to the hounds-tooth adds something extra as well as creates an extra throw pillow made with the same fabric to tie everything together. Also note: The Camaro calendar that doesn't at all match my decor, but that's alright, I have an obsession for Camaros. I keep my daily medications, Chapstick, and makeup wipes in my side table drawers. (For those late nights I just don't want get out of bed to do anything.) These items by my bed make it super convenient.
.JPG)
This chandelier is one of my favorite things in my room. It was originally a gold chandelier but was painted black with pink candles, black pearls, and diamonds added to it. Something old can always be changed into something much better like this old chandelier was!
.JPG)
.JPG)
This is an overview of my shelving system. Again, I got this at a garage sale and it was just brown wood. Painted white, it looks much better and frankly looks like a totally different piece of furniture! I put pink Christmas lights on the top which I think adds to my room. On the shelves, I lined up my lotions and not only does it look "decorative," it makes it easy to see what I want. The silver baskets on either side are from Bath and Body works and are perfect for holding my perfumes and other lotions. (I think they are available around the holidays) The bottom pink and zebra boxes hold things that don't really have a place in my room. They are perfect because they look cute yet you can't see what is inside! (Which is good, because it's a mess!)
.JPG)
.JPG)
The arrangement on top is made from various feathers, flowers, and beads. I like it because it's different from the traditional flower arrangement. (All supplies from Hobby Lobby) Another tip is to store nail polish in a vase. It's a cute decor item as well as convenient!
.JPG)
.JPG)
Finally, my dresser. My favorite piece in my room. This was painted silver and had mirrors added to it. It looks so fancy, I love it! I put my favorite nail polishes in a glass bowl on top of my dresser because I think it looks pretty reflected in the mirrors.
.JPG)
.JPG)
Another cheap decor tip: Take pictures yourself, put them in black and white, and place them in frames. So simple, but adds so much. I took these pictures when I was in New York City, and they go perfect in my room!
.JPG)
I know this is ALOT. But, I hope you found some, if not all helpful. I hope this inspired you to redecorate your room because it really is fun!
Hey, Everyone!
Hope ya'll are doing well!
IT'S ELECTION DAY!
Everyone who is eligible to vote, better have! Troops died for our freedom to vote, so you best not take it for granted!
Anyways...
The two presidential canidates are Barack Obama(D) and Mitt Romney(R) with vice presidents Joe Biden(D) and Paul Ryan(R).
Regardless of who you voted for, none can deny the dreamboat that is Paul Ryan. Am I right?
But, the candidates above aren't the only ones! Don't forget: John Gregg (D) and Mike Pence (R) for governor and Joe Donnelly (D) and Richard Mourdock(R) for the Senate.
These canidates are for the state of Indiana. To see more information on Indiana elections or your home state click here.
ABC has a live update of the 2012 election. It is actually quite interesting, you can see Donald Trump voting and his claim that it's his "real hair." I beg to differ....
So, enough with all the election craziness!
How am I relating the election to room decor, you ask?
Well, if your presidential choice did not come out on top, and you feel like packing up and running for the border, makeover your room instead!
Stretching it? Yes.
The following will show you how my room is set up, decorated, and organized, and hopefully will give some ideas on how you can makeover your room!
WARNING: This post is going to be a little picture heavy, but that's only because my entire room is pink, so I got a bit wild taking pictures!
Being a college student, it's hard to make your room look how you truly want it. In my apartment, it has commercial grey carpeting and plain white walls that we aren't allowed to paint. So, I had to make the most of it, and I think I did a pretty good job! (For my decorating style, at least.)
The first picture is an overview of my room. As you can see, lots of pink. But, underneath my bed, I have large totes to keep many of my t-shirts, sweats, and sweatshirts. I also have one that has my lesser fancy shoes in. (Fancier shoes shown later) This actually cleans up much of the clutter that would be around my room because the totes just slide right under my bed! Also, you can see just the corner of a black rug I have in my room. This obviously makes the grey carpet less ugly.

.JPG)
.JPG)
.JPG)
To keep my wristlets in one place I hang them on this cute hook I bought at Hobby Lobby for under $2. It also is a good place to hold my keys because I am notorious for losing them in my room!
.JPG)
.JPG)
.JPG)
The hounds-tooth pillow on my chair was actually made to match the stool of my vanity. The stool on my old vanity was plain white, but I think changing it to the hounds-tooth adds something extra as well as creates an extra throw pillow made with the same fabric to tie everything together. Also note: The Camaro calendar that doesn't at all match my decor, but that's alright, I have an obsession for Camaros. I keep my daily medications, Chapstick, and makeup wipes in my side table drawers. (For those late nights I just don't want get out of bed to do anything.) These items by my bed make it super convenient.
.JPG)
This chandelier is one of my favorite things in my room. It was originally a gold chandelier but was painted black with pink candles, black pearls, and diamonds added to it. Something old can always be changed into something much better like this old chandelier was!
.JPG)
.JPG)
This is an overview of my shelving system. Again, I got this at a garage sale and it was just brown wood. Painted white, it looks much better and frankly looks like a totally different piece of furniture! I put pink Christmas lights on the top which I think adds to my room. On the shelves, I lined up my lotions and not only does it look "decorative," it makes it easy to see what I want. The silver baskets on either side are from Bath and Body works and are perfect for holding my perfumes and other lotions. (I think they are available around the holidays) The bottom pink and zebra boxes hold things that don't really have a place in my room. They are perfect because they look cute yet you can't see what is inside! (Which is good, because it's a mess!)
.JPG)
.JPG)
The arrangement on top is made from various feathers, flowers, and beads. I like it because it's different from the traditional flower arrangement. (All supplies from Hobby Lobby) Another tip is to store nail polish in a vase. It's a cute decor item as well as convenient!
.JPG)
.JPG)
Finally, my dresser. My favorite piece in my room. This was painted silver and had mirrors added to it. It looks so fancy, I love it! I put my favorite nail polishes in a glass bowl on top of my dresser because I think it looks pretty reflected in the mirrors.
.JPG)
.JPG)
Another cheap decor tip: Take pictures yourself, put them in black and white, and place them in frames. So simple, but adds so much. I took these pictures when I was in New York City, and they go perfect in my room!
.JPG)
I know this is ALOT. But, I hope you found some, if not all helpful. I hope this inspired you to redecorate your room because it really is fun!
Stay tuned to the election, but in the meantime DECORATE!
Have a good one, everybody!
Monday, November 5, 2012
Veterans Day, Freedom to Vote, and Banana Peanut Butter Muffins
By Britny Burton [self-proclaimed craft freak]
This year is a big election year as Americans are faced with not only voting for state representatives, but also for the president. It wasn't until 1840 that each state voted on the same day. Every election year the date for voting is the same: the first Tuesday after the first Monday in November. For example, if the month of November started on a Tuesday, voting would be the next Tuesday because there hadn't been a Monday in November yet. In today's society this odd rule may not make much sense, but back in the 1800s it seemed fairly logical.
Just to break it down, here's a few reasons why elections are held when they are::
Unlike the election day, Veterans Day is always on November 11th. It was originally called Armistice Day and was formed in 1919 to celebrate one year since World War I had ended. It was on the 11th hour of the 11th day of the 11th month in 1918 that the war officially ended. It wasn't until 1938 that it was considered a national holiday and in 1954 the day was changed to honor all veterans.
I encourage everyone to exercise their right to vote and get out on election day. If you are still unsure of who to vote for, go to www.isidewith.com and take the quiz. If you are unsure of whether you are registered or if you just don't know where you can go to vote on November 6th, go to www.canivote.org to find out.
Since you may be going out to vote early in the morning, you're not going to be in the mood to cook and fast food is not that good for you. Here's an awesome banana peanut butter muffin recipe you can whip up the night before.
Ingredients:
2. Smash up the bananas in a large bowl. Try to get them as smooth as possible.
3. Add the rest of the ingredients to the bowl.
 4. Spray a muffin pan and fill the cups up a little over half way.
5. Cook at 350* for 18-20 minutes.
6. Once they are done in the oven immediately set them on a cooling rack so they are still soft and don't continue to cook in the tray.
 7. Enjoy!

I would like to note that I am a member of the Indiana National Guard. I tried to keep my information about Veterans Day as unbias as possible. Thank you to all of you who serve or have served.
This year is a big election year as Americans are faced with not only voting for state representatives, but also for the president. It wasn't until 1840 that each state voted on the same day. Every election year the date for voting is the same: the first Tuesday after the first Monday in November. For example, if the month of November started on a Tuesday, voting would be the next Tuesday because there hadn't been a Monday in November yet. In today's society this odd rule may not make much sense, but back in the 1800s it seemed fairly logical.
Just to break it down, here's a few reasons why elections are held when they are::
- The electoral college would meet the first Wednesday in December so elections had to be held the month prior.
- Harvesting would have ended by this time.
- It wasn't too cold yet in most places so for families who had to travel to vote they could do so more easily. Also, Sunday was considered still a day of rest for most people, so if needed, travelling would be done on Monday to get to voting on Tuesday.
- November 1st is All Saints Day in the catholic religion, hence the rule for elections to never be on the first day in November.
Unlike the election day, Veterans Day is always on November 11th. It was originally called Armistice Day and was formed in 1919 to celebrate one year since World War I had ended. It was on the 11th hour of the 11th day of the 11th month in 1918 that the war officially ended. It wasn't until 1938 that it was considered a national holiday and in 1954 the day was changed to honor all veterans.
I encourage everyone to exercise their right to vote and get out on election day. If you are still unsure of who to vote for, go to www.isidewith.com and take the quiz. If you are unsure of whether you are registered or if you just don't know where you can go to vote on November 6th, go to www.canivote.org to find out.
Since you may be going out to vote early in the morning, you're not going to be in the mood to cook and fast food is not that good for you. Here's an awesome banana peanut butter muffin recipe you can whip up the night before.
Ingredients:
- 2 cups flour
- 3/4 tsp baking soda
- 1/2 tsp salt
- 1 cup sugar
- 1/4 cup melted butter
- 3-4 bananas
- 2 eggs
- 1/3 cup sour cream
- 1 cup peanut butter chip
- 1 tsp vanilla extract
- 1-2 tsp ground cinnamon
2. Smash up the bananas in a large bowl. Try to get them as smooth as possible.
3. Add the rest of the ingredients to the bowl.

5. Cook at 350* for 18-20 minutes.
6. Once they are done in the oven immediately set them on a cooling rack so they are still soft and don't continue to cook in the tray.


Celebrate a 21st with this Classy Gift
By: Mallory Jordan, moderately crafty
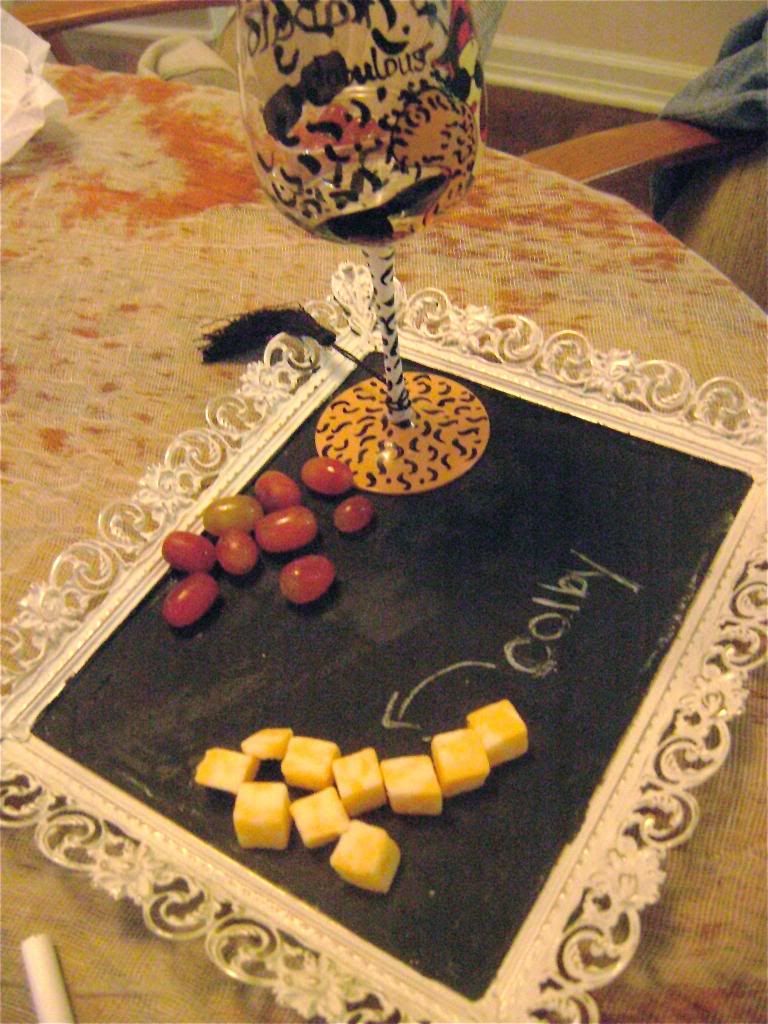
In more personal news, it's my 21st birthday today! I decided to celebrate by making myself a simple, but classy gift.
Wine and cheese platters are one of the most simple touches any one can make to a classy get together. They show off those expensive cheeses and delicious wines that complement.
I have become especially envious of the shabby-chic DIY chalkboard wine and cheese platters. They allow the host or hostess to label each cheese, and if the board is big enough, each wine. So, naturally, I had to create my own. Now that I am 21 years old, I can't get away with a wine night that doesn't have the classiest of accessories to show off.
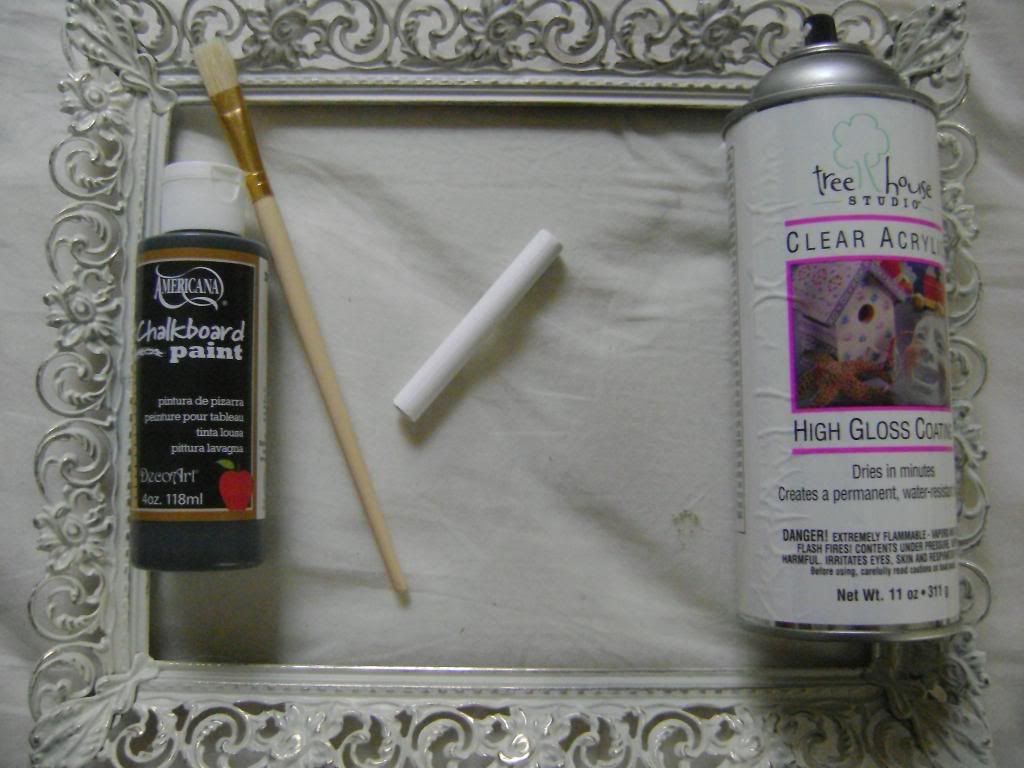 All I bought for this project was:
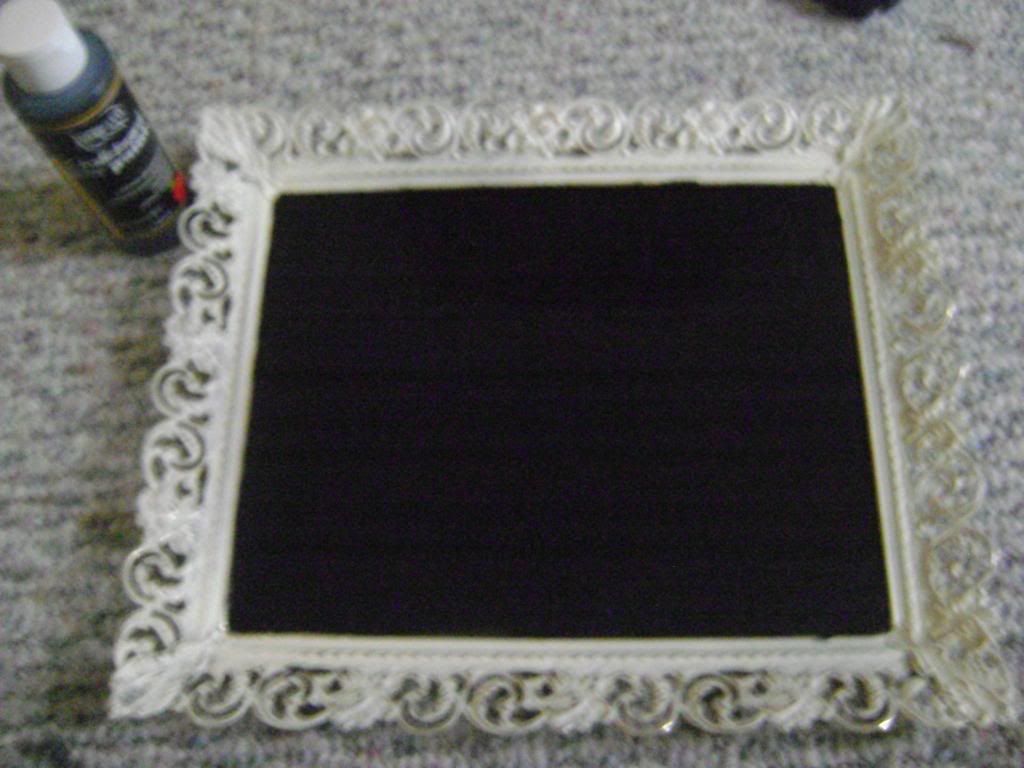 Follow the instructions on the back of the chalkboard paint. If you get the same brand as mine, you will want to first paint the glass horizontally. Let the paint dry for 1 hour and then paint the second coat vertically. This will give the proper coverage. You must wait 24 hours after the second coat before using chalk on it. My paint said you could use water for clean up, but I suggest just using a dry paper towel.
A "wine and cheese" board on Indulgy has other great ideas for wine and cheese platters. Not only does the board have similar designs to use with my DIY idea, but also other wine and cheese plate designs and other ways to use chalkboard paint for wine and cheese night accessories.
In more personal news, it's my 21st birthday today! I decided to celebrate by making myself a simple, but classy gift.
Wine and cheese platters are one of the most simple touches any one can make to a classy get together. They show off those expensive cheeses and delicious wines that complement.
I have become especially envious of the shabby-chic DIY chalkboard wine and cheese platters. They allow the host or hostess to label each cheese, and if the board is big enough, each wine. So, naturally, I had to create my own. Now that I am 21 years old, I can't get away with a wine night that doesn't have the classiest of accessories to show off.
All I bought for this project was:- An antique style 8X10 frame from eBay.com - $11
- Chalkboard paint from Hobby Lobby - $4
- Chalk
- And some kind of primer for the glass
If you use a frame and plan on painting the glass like I did, it is necessary to get some kind of spray primer made for glass. This will help the chalkboard paint actually stick to the surface of the glass.
Before applying the primer, it is important to clean off the glass. Rubbing alcohol will ensure that the glass is clean. Once the adhesive primer has dried, you can apply the chalkboard paint.
Follow the instructions on the back of the chalkboard paint. If you get the same brand as mine, you will want to first paint the glass horizontally. Let the paint dry for 1 hour and then paint the second coat vertically. This will give the proper coverage. You must wait 24 hours after the second coat before using chalk on it. My paint said you could use water for clean up, but I suggest just using a dry paper towel.
I also took out the frame's back piece with the stand and put cardboard in place of it so it looks more like a platter than a reused frame.
After 24 hours, you now have a simple, inexpensive and shabby-chic wine and cheese platter. Your guests will be jealous and wonder how you did it, I promise.
A "wine and cheese" board on Indulgy has other great ideas for wine and cheese platters. Not only does the board have similar designs to use with my DIY idea, but also other wine and cheese plate designs and other ways to use chalkboard paint for wine and cheese night accessories.
Thursday, November 1, 2012
Dia de los Muertos/Day of the Dead
By Lindsey Riley (The Crafting-Challenged Blogger)
Happy November, everybody! We are celebrating the change in months by going a little international with our post this week!
November 1 and 2 are two very important days in Mexico and Latin culture, in general. The two days mark the celebration of Dia de los Muertos, which translates to Day of the Dead. For these two days, families gather to remember their loved ones who have passed on. They visit the cemeteries and place flowers on the graves. They also partake in other traditions that include: Building private altars honoring the deceased and decorating them using sugar skulls, marigolds and the favorite foods and beverages of the departed; singing and drinking; and serenading of the dead from mariachis.
Sugar skulls are a treat that both the living and dead can enjoy, and the treat has become a major symbol of the holiday. I have posted a recipie for sugar skulls but since they are more detailed, I did not attempt at them. Remember: I am the crafing challenged blogger!
What I did attempt at is Pan de Muerto, a sweet egg bread that can be made into various shapes and is often decorated with white frosting in attempt to make it look like bones. I used a recipe from TLC Cooking for this one. Here it is, the same way it was listed on the website:
What you need:
For me, the recipe was easy to follow, and I felt like it made the baking easier to do. Like I've always said, I am crafting and cooking/baking challenged, so the easier the better in my case! I'm sorry, but I completely forgot about taking pictures of my final product, and my friends ate all of it already. Good food doesn't last long in college! You can easily use Google to find photos of how many peoples' final Pan de Muerto turned out and see the variety used with decorating the bread.
Please share with us how these recipes turned out for you and if you have any more traditional crafts or meals that relate to Dia de los Muertos.
Happy November, everybody! We are celebrating the change in months by going a little international with our post this week!
November 1 and 2 are two very important days in Mexico and Latin culture, in general. The two days mark the celebration of Dia de los Muertos, which translates to Day of the Dead. For these two days, families gather to remember their loved ones who have passed on. They visit the cemeteries and place flowers on the graves. They also partake in other traditions that include: Building private altars honoring the deceased and decorating them using sugar skulls, marigolds and the favorite foods and beverages of the departed; singing and drinking; and serenading of the dead from mariachis.
Sugar skulls are a treat that both the living and dead can enjoy, and the treat has become a major symbol of the holiday. I have posted a recipie for sugar skulls but since they are more detailed, I did not attempt at them. Remember: I am the crafing challenged blogger!
Sugar Skulls
- 2 1/2 cups sugar
- 1 egg white from an extra large egg, or 2 from small eggs
- 1 teaspoons light corn syrup
- 1 teaspoon vanilla
- Cornstarch, about a half cup, for powdering surface
- Colored sprinkles
- Food coloring
- Fine paint brush
- Colored icing
- Candy sticks (optional)

- Sift sugar into a large mixing bowl.
- In another bowl, mix the egg whites, corn syrup and vanilla.
- Slowly pour the liquid into the powdered sugar. Mix with your hands until a sandy dough forms.
- Form dough into a ball. At this point you can continue or you can refrigerate dough for later use.
- Lightly dust surface with cornstarch as well as your hands. Pinch off a heaping tablespoon of dough and shape it into a skull.
- Press the candy sticks into the bottom of each skull.
- If you're using them, lightly press colored sprinkles into the soft candy.
- Let the candy dry overnight.
- When candy is dry, use the paint brush with food coloring to decorate the skulls. Or you can use frosting (one that will dry hard) with a find tip to decorate them.
- Hand them out as is, or wrap in a small cellophane bag tied closed with a small ribbon.
What I did attempt at is Pan de Muerto, a sweet egg bread that can be made into various shapes and is often decorated with white frosting in attempt to make it look like bones. I used a recipe from TLC Cooking for this one. Here it is, the same way it was listed on the website:
What you need:
1/2 cup butter 1/2 cup milk
1/3 cup water 5 cups flour
1 tablespoon anise seeds Glaze
4 eggs 1/2 cup plus 1 tablespoon sugar
1/2 teaspoon salt 2 packets dry yeast
Prep:
Heat butter, milk and water in small saucepan over medium-low heat until butter is melted and mixture is very warm but not boiling. Combine 1 cup flour, yeast, salt, anise seeds and sugar in large bowl. Add warm milk mixture; beat until well blended. Add eggs; beat until blended. Add 1 cup flour; beat until blended. Continue adding flour until dough is soft but not sticky. Knead on lightly floured surface 10 minutes or until smooth and elastic. Lightly oil large bowl; place dough in it. Cover dough with plastic wrap; let rise in warm place until doubled in bulk, about 2 hours. Punch down dough; shape into 1 or 2 loaves resembling skulls or skeletons, or round leaves with dough "bones" placed ornamentally around top. Let rise 1 hour. Preheat oven to 370°F. Bake loaves on pizza stone or lightly greased baking sheet until loaf sounds hollow when tapped. Cool slightly on wire rack. Paint with Glaze while bread is wtill warm. Cool to room temperature before serving.
For the Glaze:
Place 1/2 cup sugar, 1/3 cup fresh orange juice and grated zest of 1 orange in a small saucepan. Boil 2 minutes. Paint on bread with a pastry brush.
Please share with us how these recipes turned out for you and if you have any more traditional crafts or meals that relate to Dia de los Muertos.
Subscribe to:
Posts (Atom)