Showing posts with label Halloween. Show all posts

Thursday, November 1, 2012

Dia de los Muertos/Day of the Dead

By Lindsey Riley (The Crafting-Challenged Blogger)

Happy November, everybody! We are celebrating the change in months by going a little international with our post this week!

November 1 and 2 are two very important days in Mexico and Latin culture, in general. The two days mark the celebration of Dia de los Muertos, which translates to Day of the Dead. For these two days,  families gather to remember their loved ones who have passed on. They visit the cemeteries and place flowers on the graves. They also partake in other traditions that include: Building private altars honoring the deceased and decorating them using sugar skulls, marigolds and the favorite foods and beverages of the departed; singing and drinking; and serenading of the dead from mariachis.

Sugar skulls are a treat that both the living and dead can enjoy, and the treat has become a major symbol of the holiday. I have posted a recipie for sugar skulls but since they are more detailed, I did not attempt at them. Remember: I am the crafing challenged blogger!

Sugar Skulls

  • 2 1/2 cups sugar
  • 1 egg white from an extra large egg, or 2 from small eggs
  • 1 teaspoons light corn syrup
  • 1 teaspoon vanilla
  • Cornstarch, about a half cup, for powdering surface
  • Colored sprinkles
  • Food coloring
  • Fine paint brush
  • Colored icing
  • Candy sticks (optional)
  1. Sift sugar into a large mixing bowl.
  2. In another bowl, mix the egg whites, corn syrup and vanilla.
  3. Slowly pour the liquid into the powdered sugar. Mix with your hands until a sandy dough forms.
  4. Form dough into a ball. At this point you can continue or you can refrigerate dough for later use.
  5. Lightly dust surface with cornstarch as well as your hands. Pinch off a heaping tablespoon of dough and shape it into a skull.
  6. Press the candy sticks into the bottom of each skull.
  7. If you're using them, lightly press colored sprinkles into the soft candy.
  8. Let the candy dry overnight.
  9. When candy is dry, use the paint brush with food coloring to decorate the skulls. Or you can use frosting (one that will dry hard) with a find tip to decorate them.
  10. Hand them out as is, or wrap in a small cellophane bag tied closed with a small ribbon.

What I did attempt at is Pan de Muerto, a sweet egg bread that can be made into various shapes and is often decorated with white frosting in attempt to make it look like bones. I used a recipe from TLC Cooking for this one. Here it is, the same way it was listed on the website:

What you need:
1/2 cup butter           1/2 cup milk
1/3 cup water            5 cups flour
1 tablespoon anise seeds   Glaze
4 eggs                          1/2 cup plus 1 tablespoon sugar
1/2 teaspoon salt          2 packets dry yeast

Prep:  
Heat butter, milk and water in small saucepan over medium-low heat until butter is melted and mixture is very warm but not boiling. Combine 1 cup flour, yeast, salt, anise seeds and sugar in large bowl. Add warm milk mixture; beat until well blended. Add eggs; beat until blended. Add 1 cup flour; beat until blended. Continue adding flour until dough is soft but not sticky. Knead on lightly floured surface 10 minutes or until smooth and elastic. Lightly oil large bowl; place dough in it. Cover dough with plastic wrap; let rise in warm place until doubled in bulk, about 2 hours. Punch down dough; shape into 1 or 2 loaves resembling skulls or skeletons, or round leaves with dough "bones" placed ornamentally around top. Let rise 1 hour. Preheat oven to 370°F. Bake loaves on pizza stone or lightly greased baking sheet until loaf sounds hollow when tapped. Cool slightly on wire rack. Paint with Glaze while bread is wtill warm. Cool to room temperature before serving.
For the Glaze:
Place 1/2 cup sugar, 1/3 cup fresh orange juice and grated zest of 1 orange in a small saucepan. Boil 2 minutes. Paint on bread with a pastry brush.

For me, the recipe was easy to follow, and I felt like it made the baking easier to do. Like I've always said, I am crafting and cooking/baking challenged, so the easier the better in my case! I'm sorry, but I completely forgot about taking pictures of my final product, and my friends ate all of it already. Good food doesn't last long in college! You can easily use Google to find photos of how many peoples' final Pan de Muerto turned out and see the variety used with decorating the bread.

Please share with us how these recipes turned out for you and if you have any more traditional crafts or meals that relate to Dia de los Muertos.

Sunday, October 28, 2012

Halloween Movie Maddness: Steve Zissou DIY Costume


By: Mallory Jordan, moderately crafty

Don't have a costume figured out yet? Don't panic!

This costume is aimed towards those in need of an awesome Halloween get-up that doesn't cost a lot of cash. When in poverty, go to Goodwill!

Many local bloggers have jumped on the Goodwill train for easy and affordable costumes.
 I even found an entire Pinterest page filled with DIY Goodwill costumes.

Goodwill is actually selling a small selection of new costumes and accessories this year. However, I still want to keep the creative tradition and find my own pieces to a unique costume.

The heroic Steve Zissou is my Halloween inspiration this year. For those of you who have seen the Wes Anderson film, "The Life Aquatic," this is a pretty simple costume that costs too much in stores.

Photobucket
Photobucket  Store bought Costume -->
 $65.00-$70.00


Photobucket


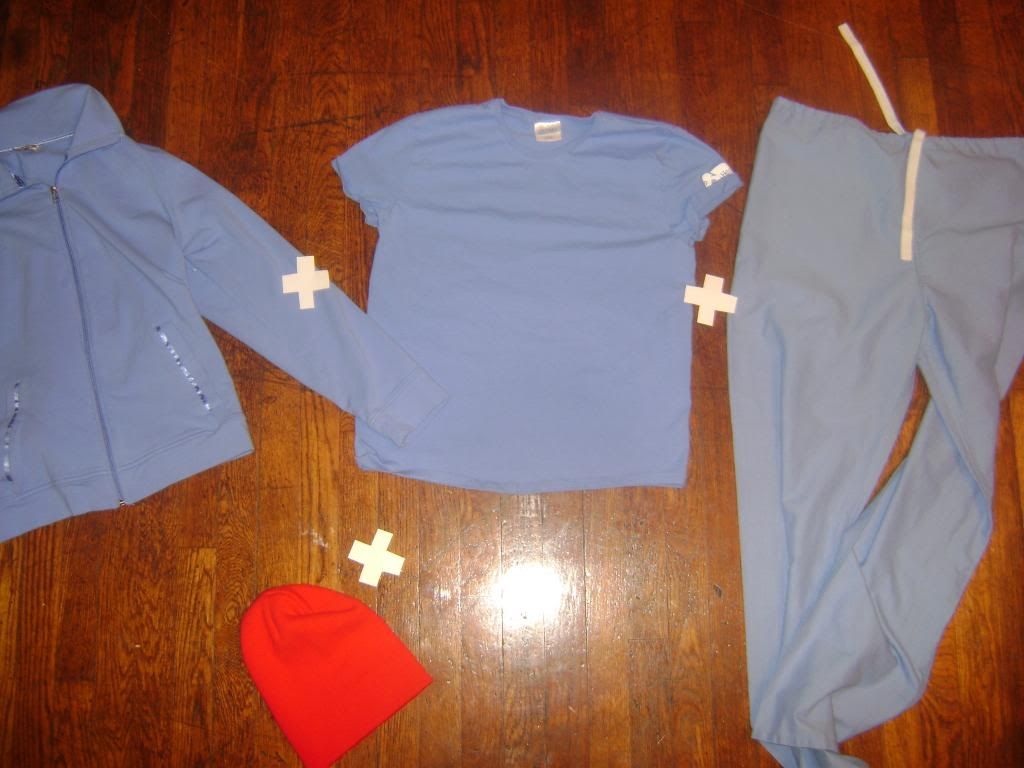
Costume pieces purchased at Goodwill
Less than $10  -->
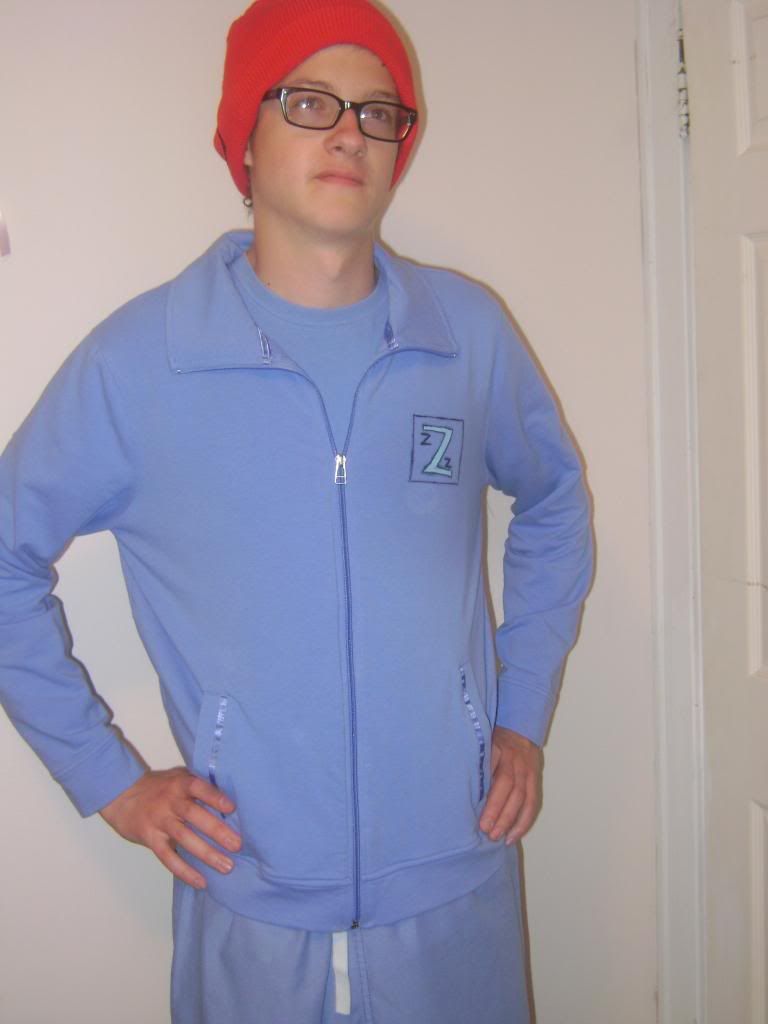
Make sure the look is monochromatic and matches. I have a zip up jacket, a t-shirt (a polo works as well), scrubs, and a red beanie cap.


Photobucket
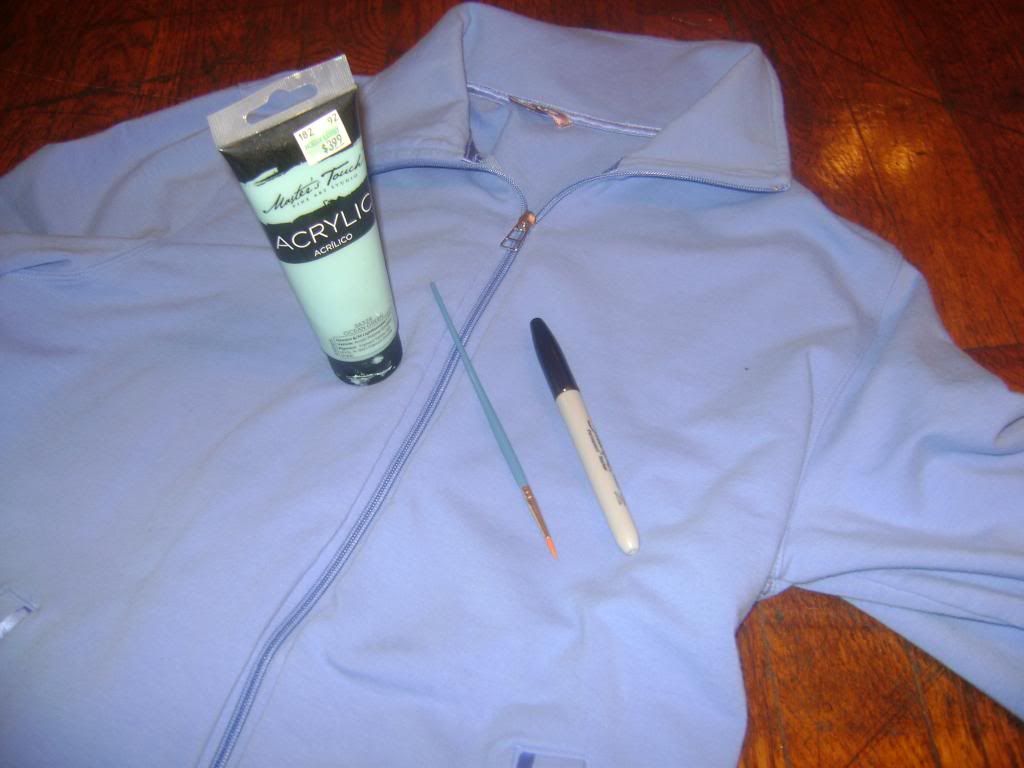
The most important detail of the costume is the Zissou logo. There are multiple variations of the logo, but I am going to use a black Sharpie for the darker details/outline, and the light blue acrylic paint I used previously for my leaf project. Dark blue paint for the outline and yellow paint for the smaller "z"'s are other alternatives.


Photobucket


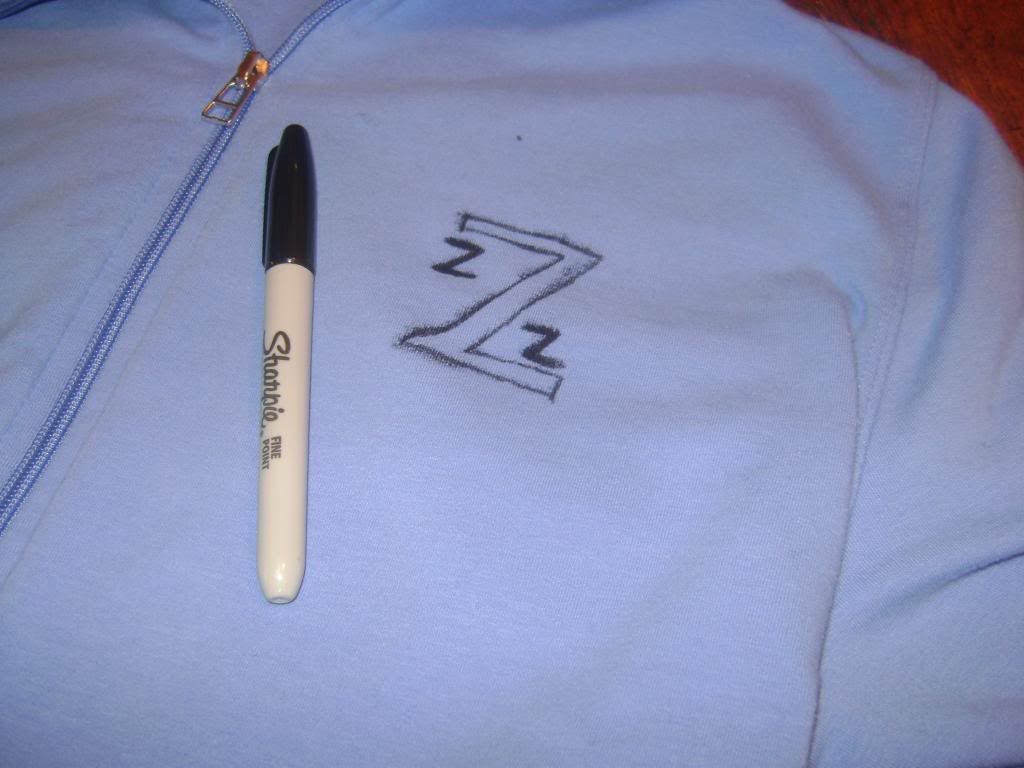
First, I use the Sharpie to make an outline for the large "Z" and heavily draw the small "z"'s on the upper left inside of the "Z" and the lower right of it.


Photobucket


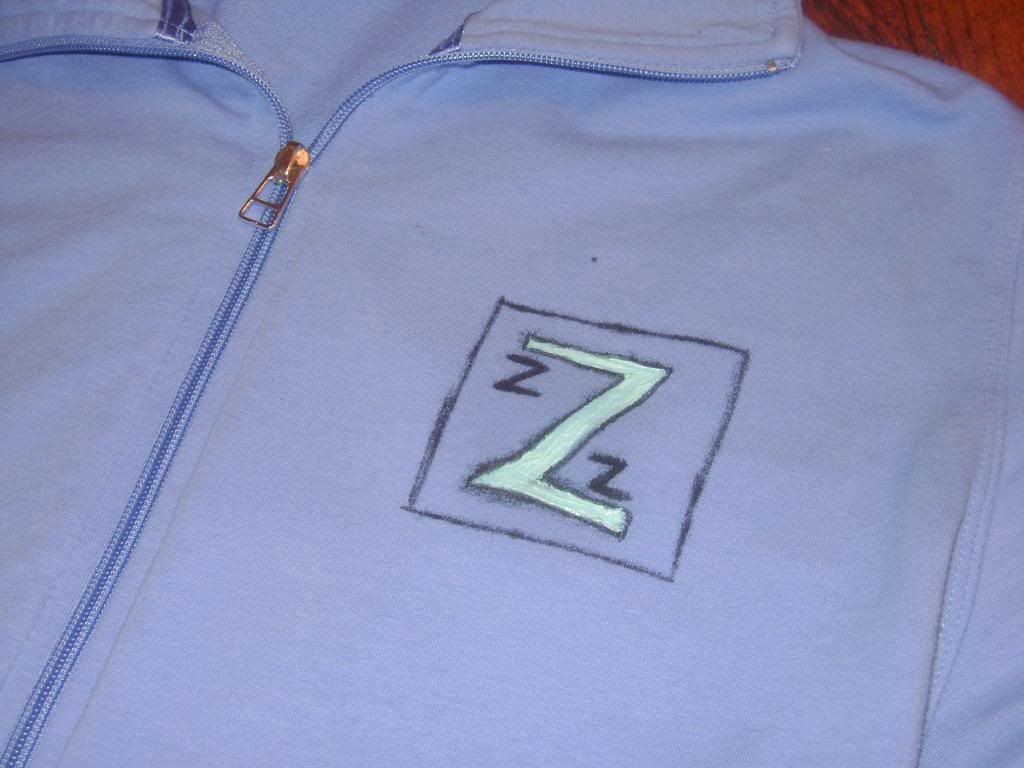
After I have used a straight edge to make the outline around the logo with my Sharpie, I bring out my light blue acrylic paint. With the small brush, I paint inside the Sharpie line.


Photobucket
Photobucket


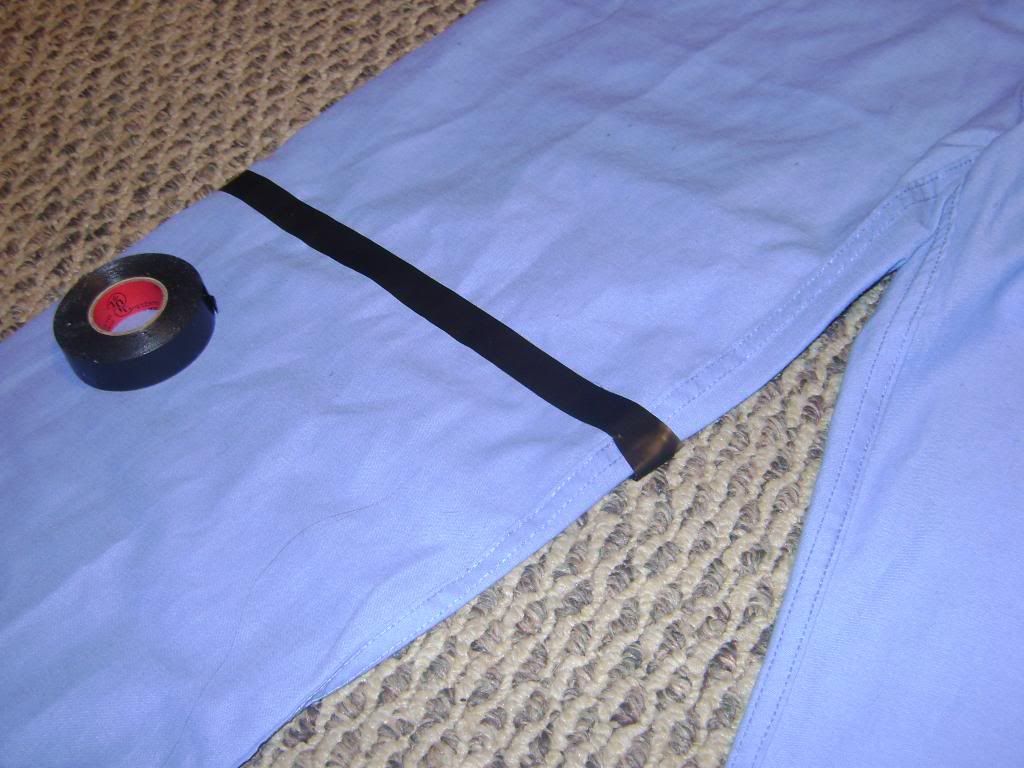
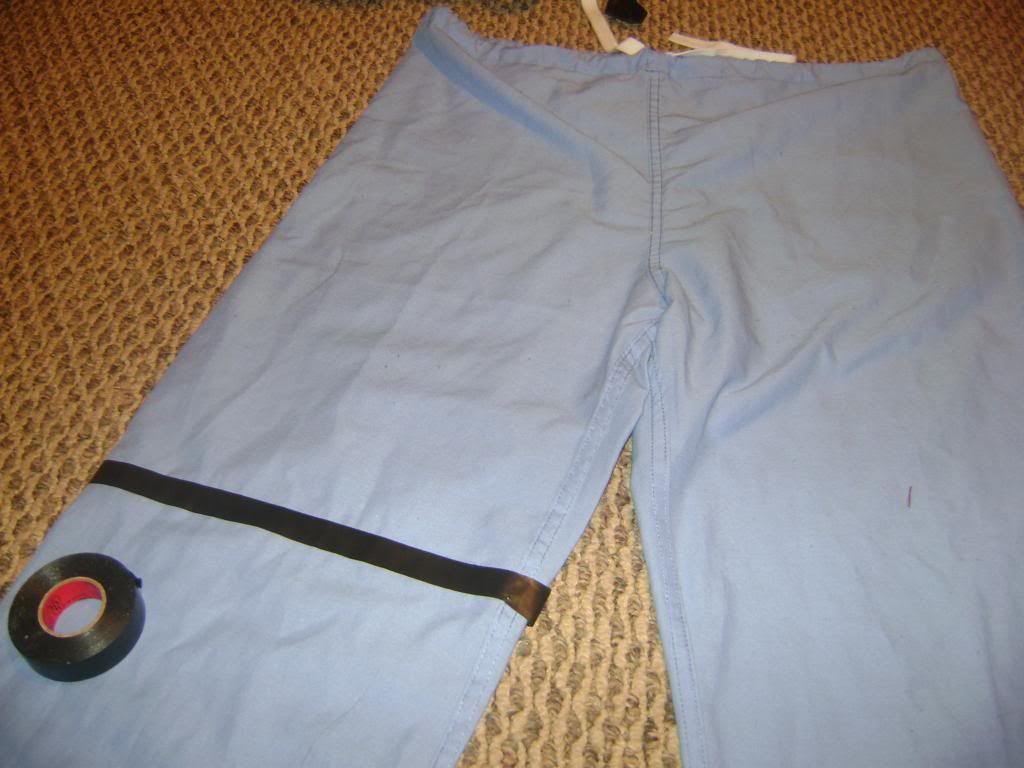
Finally, find some electrical tape or black duct tape (I prefer electrical because it is less shiny). This is for the holsters Team Zissou has around their legs.


Spread out the fabric so that the tape sticks between creases. This makes the tape looser and a better fit on the fabric. You don't want to make the tape tighter than the pant or the tape could break off when worn.


PhotobucketPhotobucketPut on the t-shirt, jacket with painted logo, scrub pants with the electrical tape for the "holster" and the red beanie for the final touch. Slip on some sneakers (Adidas preferably). Now you have the perfect, inexpensive Steve Zissou Costume!

For other last minute Halloween Goodies, click the link!

Sunday, October 14, 2012

Tasty Fingers

By: Mallory Jordan, moderately crafty


Most people have heard the story of the woman who claimed to find a finger in her Wendy's chili back in 2005. For those of you who are not caught up in the news, it was a scam. There was a finger in the woman's chili...that she placed there herself.

More recently back in May, a teen in Michigan found a finger in his Arby's sandwich.  Unfortunately for Arby's, this incident does not seem to be a scam. Even the subtitle for the Time article is, "Unfortunately for everyone involved, it appears this actually happened."

Since 2005, human fingers have been quite popular as food toppings. "A History of Human Fingers Found in Fast Food," proves that the most frightening part is only the Wendy's finger finding has been a scam. There was a second incident at Arby's before the Michigan teen and three other confirmed times when fingers have been found in various foods.

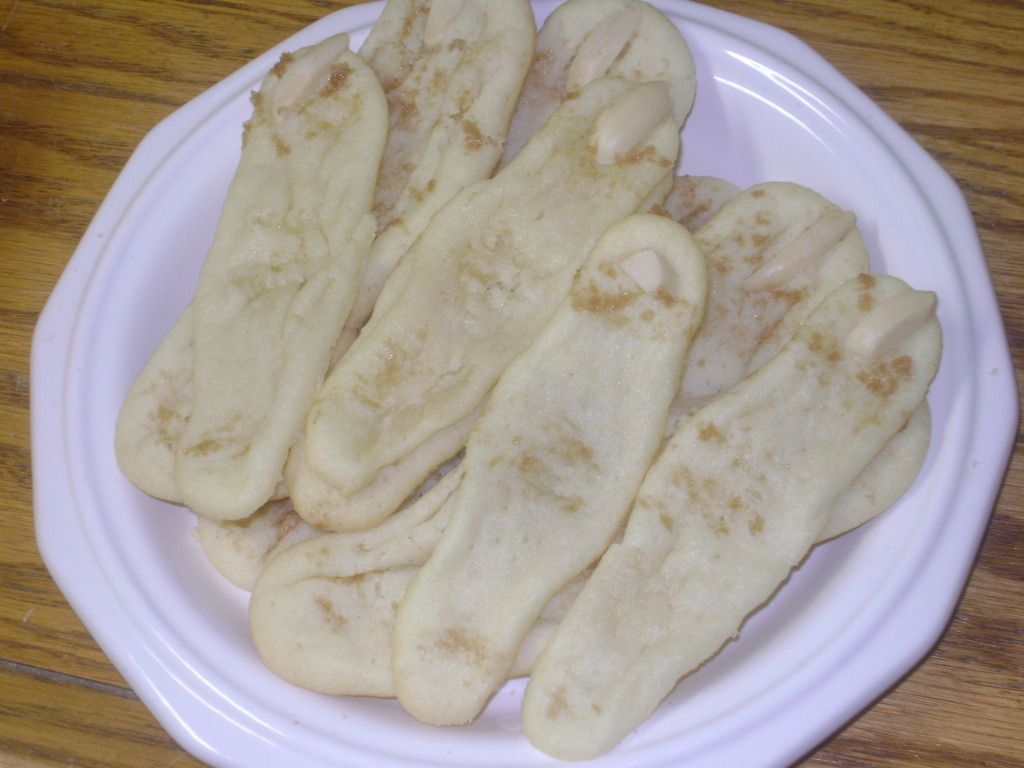
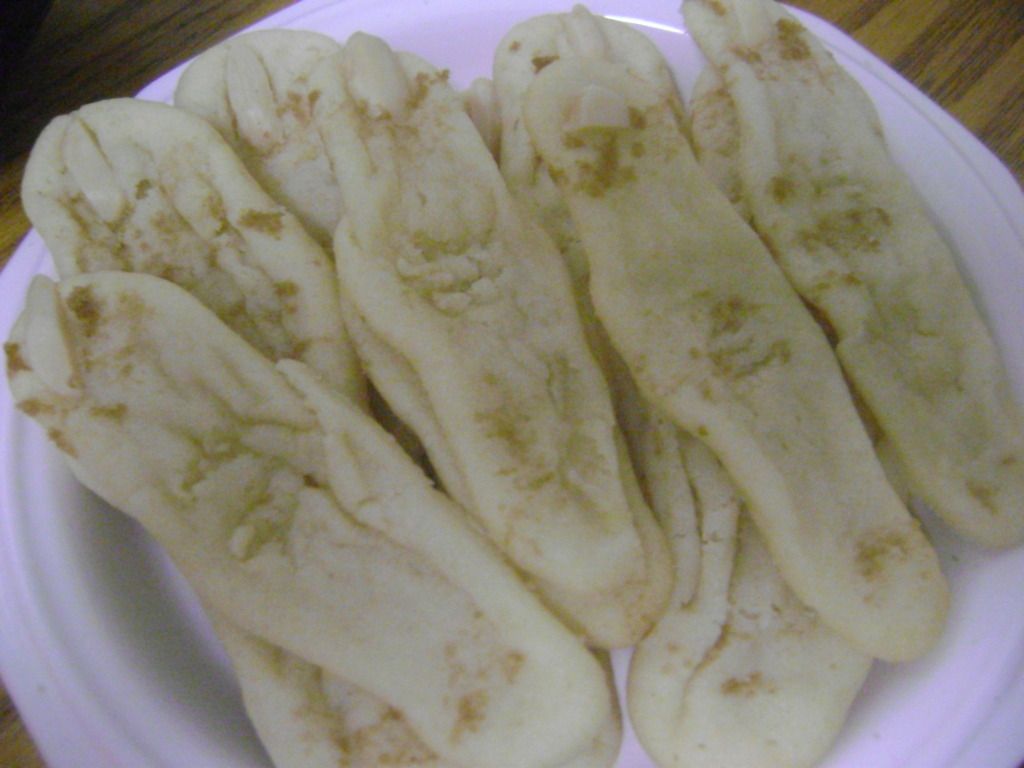
I have found a way to avoid the finger scare. Since Halloween is around the corner, choose to eat fingers instead of being surprised by them. You don't need to eat any unsuspected fingers anymore! Make these cookies so that you, and maybe even guests at a Halloween party, can enjoy the taste of fingers.


Ingredients:

1 roll of sugar cookie dough
Sliced almonds that look like fingernails
Brown Sugar (cinnamon will work too)
Cookie sheet (use foil or Pam to keep the fingers from sticking to the sheet)

*Pre-heat your oven and bake the cookies according to the dough instructions.

 Photobucket

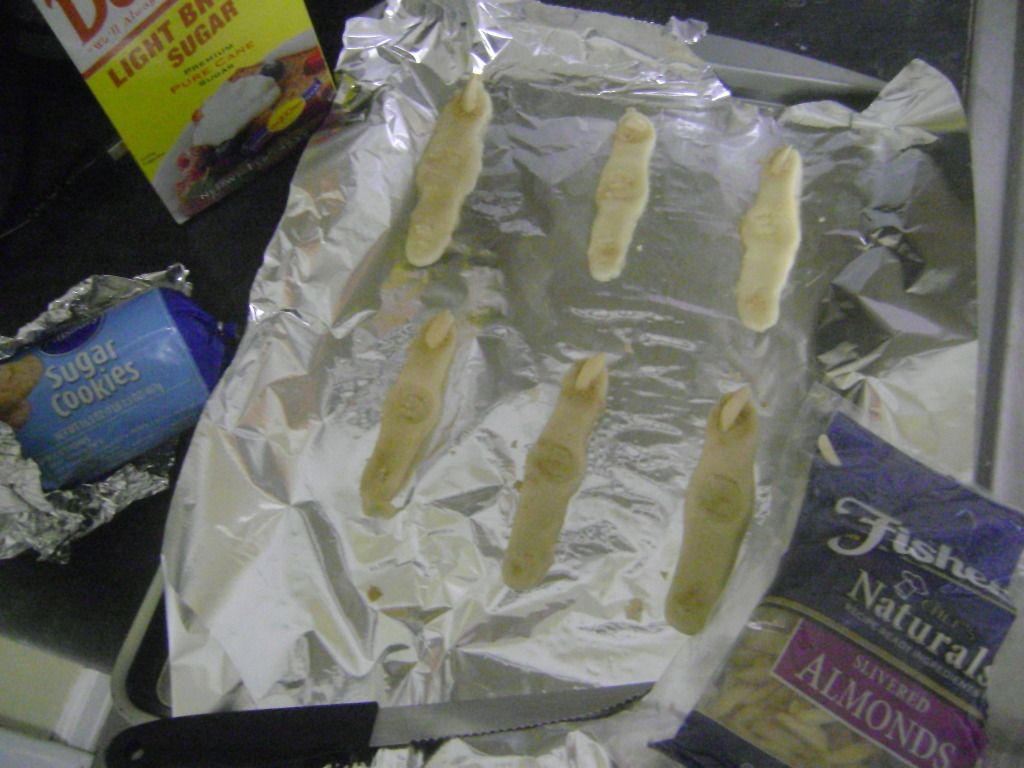
Step 1: Take quarter sized ball of cookie dough and roll it out with your hands

Step 2: Flatten the long strand of dough with your pointer finger. In the middle of the finger, make an imprint with your thumb for the knuckle.

*You will want the dough to be very flat to keep the finger shape. Otherwise, they will spread out in the oven and ruin your fingers.

Step 3: Place a sliced almond at the top for the finger nail

Step 4: Score the nail beds and knuckles. I just used a knife.

Step 5: Take the brown sugar and put in around the scored nail beds, knuckles, etc. to make the finger look dirty.

Step 6: Place in oven and bake according to the cookie dough instructions.


Photobucket


Now you have your own delicious fingers to serve! Your Halloween guests will be impressed with your trendy food choice.

Photobucket